JurassicJeep.com
About  |  Jeep #12  |  Jeep #18  |  Jeep #29  |  Reference  |  Shop  |  Forums

Posts Tagged ‘Herculiner’

Jeep #12: Herculiner Part 2

It took quite a bit of time for the first coat of the Herculiner to setup in the rear. I have applied another coat and a half to the back area, and am fairly certain that is all done. Now came the time to do the front area, and that is a major pain in the ass. The rear area was more or less for practice. It was a smooth area without a lot of corners and cracks.

The front is much different. Lots of it needs to be applied with the brush, and the areas to be rolled on are quite difficult. It took another 2-3 hours prepping, masking and painting this first coat. It will take 4-6 hours to dry, so a 2nd and hopefully third and final coat can go on tonight for it to be ready by tomorrow.

Jeep #12: Herculiner Part 1

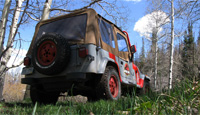
I am now finally getting around to putting down the Herculiner. I had originally planned to start this back on Friday. Now that it is Sunday, I’m a bit behind. This is due to the rust spot that had to be patched yesterday and the VERY subborn bolts that were broken off.

The first step in applying Herculiner is to clean up everything. You need a very clean (and rough) surface to apply the paint to. I used a wire wheel to scuff up the surface and then hit it with the scouring pad that was included in the Herculiner kit. The kit by the way is available at most autopart stores and costs about $90 for the kit.

The next step will be to mask off all the areas that you don’t want the coating. It is going to be very thick, and very strong. You don’t want this covering up drain holes or flowing into bolt holes. This is one of the most important steps in the process. If you get the Herculiner somewhere you don’t want it, getting it off will be difficult.

For the holes I used silicone hole plugs. These things are typically used in Powder Coating situations where you don’t want powder getting into holes. Nothing sticks to silicone (except silicone), so hopefully I can just yank the plugs out of the holes and remove the herculiner sitting on them. We will see… but so far this is the easiest solution.

The application of Herculiner is fairly straight forward, but this stuff is pretty thick! Its not going to be like normal paint, as it has chunks of rubber in it. Using a paint brush you first go after all the corners and hard to reach areas. Then using the roller, you apply a thin coat. It should be thin, almost transparent. It would be wise to thin the Herculiner with Xylene for this first coat (I however did not).

The first coat needs to set for 1 to 4 hours. So I think I will work on something else while it is setting.

Jeep #12: Fixing the hole in the floor

The rusty area that we found yesterday was wire wheeled and the bad area was identified. The area to be cut out was marked in yellow paint. There is a little bit of rust extending out of this area, but it is for the post part surface rust. The remaining metal is plenty thick for securing to.

Here the bad metal was completely cut out. A 1/2″ thick border was left to secure to.

A 16 gauge patch panel was cut out to fit over the area.

The panel was tack welded into place and then a bead was put around the whole patch.

Next step will be to seal the underside with seam sealer and paint. After that.. we start prepping for the herculiner!

Jeep #12: Prepping the Interior for Herculiner

Today was a big day for progress on the interior. It was decided that I would be stripping the inteior and laying down a layer of Herculiner to hopefully subside any eventual rust on the body. The Jeep is in such a great shape that we were hoping for the best as far as hidden rust spots were concerned. After the doors and hard top were removed the first step was to remove the carpet and rear seat. This is a very easy task, its just a lot of fishing carpet around mounts and removing bolts.

When it came down to removing the rear seat, the first level of resistance was reached. Three out of the four bolts holding the front of the rear seat down snapped off. And they snapped off nearly flush with the surface. Getting them out will be still one of the hardest things to do.


Moving foward into the Jeep the front seats and carpet are removed. Here you can see the first glimpse at the floor rust. Like the rear seat there was some issue getting out the front seat. Two of the bolts proved to be rather difficult to remove, but came out after some finessing.


The rust on the driver side floor pan was initially viewed as horrible surface rust. As we chipped away at the rust, it was obvious that the floor would need to be replaced. There should be plenty of solid metal to weld a new section of sheet metal in place. Normally I would weld in a replacement panel, but I would much rather have this done over the weekend and not push the project back into the next week.

The rollcage bolts have been removed in the rear, and the cross bar was removed with the sound bar. Unfortunately four of the front bolts on the rollcage were sized, and stripped out several Torx sockets. We could not apply enough torque on the torx to remove the bolts. The solution was to purchase several cheap Torx sockets and weld one to each bolt. With a much larger cross section making contact with the bolt they broke loose easily with a 2 foot breaker bar.

Jeep #18: Rollcage Off, Windshield Down

I pulled the interior yesterday, gave it a good long cleaning and scuffed it up for it’s bi-annual application of herculiner. I try to make sure everything is clean and pretty on the cars every year, but last summer was spent building the new Ecto, and I completely neglected the Jeep. Once I had the liner on I touched up the paint on the ends of the rollcage, painted my center console forest green (the blue has just gotten too nasty and faded), and retouched the bumpers. Man what a difference a little touch-up work on the dings and scratches make for my perception of this Jeep!

But I’ve created a dilemma in pulling everything out of the jeep. When I first got it, I drove it around town all summer long sans rollcage, with the windshield folded down. I fell in love with that go-kart, zero-blind spot sensation, and I felt I lost a little bit of it every time I added something to the jeep. Initially it was just the roll cage that bummed me out. Then the black soft top hardware, and the lightbar, followed by the lights. I felt like I was getting boxed in, and that my gloriously-simple topless vehicle was becoming just another ordinary car. Now that I have everything pulled, I DON’T WANT TO PUT IT BACK TOGETHER! lol

Jesus christ. Now I am debating risking life and limb to drive a wildly unsafe, and amazingly awesome, Jeep around town, putting off replacing all the rollcage parts as long as I can…. oh jesus.

Jeep #18: Interior Detailing

Update time!

Today was spent coating the interior of the jeep, covering up as much white as possible. I also had the windshield replaced, so the car is now borderline street legal.

Current state. New fender flares and rubber cowl seal are on their way from Quadtratec.

Pretty black trim that I treated and repainted today. It was certainly NOT black and shiny when I started.

I absolutely love the contrast between the windshield and…. everything! I need to fix up the interior door panels and reinstall them, so what you see is the white metal door. Also, the dash cleaned up very nicely, no need to replace the dash like I though I’d have to.

Ahhh, new interior! Coated and sealed to a semi-flat black. No rust, and easy to wash out

I also called Jeeps Unlimited down in Erie and found a new box-style set of rollbars, as well as a pair of Sierra Edition sidesteps. So it’s looking like this jeep will be very, very close to the original.

© 2010 - 2024 Jurassic Jeep - Created by AJ Quick - Jurassic Park is a Registered Trademark of Universal Studios & Amblin Entertainment, Inc