
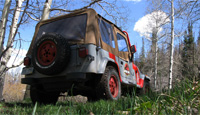
Last Month we had a batch of nice weather on the weekend. Since I had not driven the jeep since winter started I decided to pull the Jeep out of the garage and drive her around a bit. I pulled her into the driveway and let her idle for a while making sure she sounded alright and checking for fluids. Nothing in the front.. That’s weird there is something dripping right by the rear axle on the left(driver) side. FUEL.. Ohh no.
I inspected all the lines. There is a rubber fuel line from the gas tank that goes between the body and the frame and then connects to the hard lines before the fuel filter. The leak was coming from one of these lines just after it passed the frame/body grommet. The lines had deteriorated and sprung a leak.
The next day after researching what all was going to be required of fixing this, I dropped the fuel tank. Dropping the fuel tank was quite difficult, as there is very little clearance to drop the 20 gallon tank of the sahara. Here are the steps: Remove the license plate and plate frame. Remove trim around filler. Remove plastic cover under rear corner to access internal area of fuel filler. Remove filler and vent hoses from tank to filler. Support tank with jack. Remove 4 nuts along rear of gas skid plate (only need socket wrench on nut), and 3 along front of skid plate(will need monkey wrench on top of bolt and socket wrench on bottom). The tank is now Free of the vehicle. Slowly lower the tank with your jack. Try to look on top of the tank and make sure all the hoses and electrical to the tank are free and long enough. Some write ups say you have to unplug the wiring, but my wiring was long enough that I didn’t have to unplug it until after I got the tank to the floor. However my vapor line was way to short and it broke the vapor T being stretch as the tank was dropped. (It will get stuck at this point. just a warning!) The passenger side gets hung up a bit on the exhaust hanger/exhaust pipe, and the driver side fill/vent nipples get stuck on the frame rail. I just wiggled and tilted the tank and pushed the exhaust pipe out of the way until it came out. I wanted to get the tank semi empty so it was easier to handle, so I siphoned out 6-8 gallons of fuel, this was a pain, as the bends in the filler hose are very tight and the hose kept getting caught on the fuel tank’s nipple. I ended up having to siphon gas after I had removed the filler and vent hoses so I could actually access the tank. That made this take a lot longer than it probably should have. I spent 3 ish hours on this. Penetrating oil was required on the bolts to get them started.
Not only was the fuel line old and destroyed, but the filler hoses were getting bad too. I ordered the 2 custom hoses that go from the tank to the filler. (There is a fill hose and a vent hose) $25 for both hoses.
Here are the old hoses the cracking filler hose on the Left and the dual fuel hoses(supply and return), with the cracks just past the bend on the top hose :

With winter and 2 jobs I wasn’t in a rush to deal with this, it wasn’t too cold today, so after work I got busy replacing all the hoses. First I removed all the old lines. Basic stuff here, hose clamps, and then prying off the hoses. NOTE: Make yourself a diagram of which fuel line from the tank to the hard line connects with what. You don’t want to cross up the supply and return lines. Be careful when removing the hoses from the hard lines so you don’t bend a hard line by yanking to hard. Getting the old lines out of the frame/body grommet was a lot of hard yanking, I didn’t do it, but I should have cut the lines as close to the grommet as possible to make this easier.
If you ever drop your tank, and it has never been done before, replacing the filler and vent hoses is cheap insurance and you have to take them off when getting the tank out anyway.
If you didn’t destroy anything these are the Supplies Needed:
- 2 Special Order Filler/Vent Hoses ($25 for both) They are formed hoses, and special sizes to match the tank and filler.
- Several Feet of 5/16 fuel Hose
- Several Feet of 3/16 Vapor/fuel Hose
- 4 small hose clamps
- 4 medium hose clamps
I took my hoses and hose clamps with me to make sure I got the right lengths and sizes. I bought my hose clamps at home depot, the special hoses online, and the generic hoses from the local auto parts store. Since I broke the T of the vapor line, I also had to buy a new T, but both local stores didn’t have the size I needed 3/16 on the solo side, and 1/4 on both the other sides. I had to buy a 3/16 all around T, and then straight connectors with 3/16 on one side and 1/4 on the other. Ugh why weren’t all the vapor lines the same size!
Reassembly: Basically the reverse of all of the above. Getting the hoses through the grommet, use some dishwashing liquid or some other lubricant. The vapor lines the auto store had were a bit thicker on the outside than my originals and were a pain to get through, but the fuel lines were identical so not to bad. One of the barbs on the fuel tank is bigger than the other one. Getting the new line on this barb was a real pain, and probably took the most time of anything. With the hoses reconnected I then had to get the tank back up, I jacked the jeep up to get more room for the method I wanted to try to get the tank back in(which i left it stock height when removing it). Then I used a jack on the driver side and lifted it diagonally upwards, then reconnected the wiring, and then I then lifted the passenger side with another jack. It went in with this diagonal method much easier than it came out. I then shimmied it around until it lined up with the mounting holes, and the started the bolts, but did NOT tighten them. I then reinstalled the filler and its vent hose. I was afraid of tightening the tank in case I needed to move it around while getting the filler hoses back on. Once back on, Tighten it all down, get all the trim back on, and DONE. About 4 hours tonight (not counting trip to store for supplies)
Started the jeep up, running good and no Leaks!


