JurassicJeep.com
About  |  Jeep #12  |  Jeep #18  |  Jeep #29  |  Reference  |  Shop  |  Forums

Jeep #12: Frame Rotisserie

Just another quick post.

Someone asked me why I didn’t have a rotisserie to mount the frame to. I didn’t have a good answer other than because rotisseries are expensive. Then I remembered I have two engine stands sitting there. I went to Home Depot to pick up some bolts and reused the Jeep’s old suspension shackles to rig this up in about 20 minutes. The only problem with the engine stands is the fact that they are tipped upward slightly, but with a little bit of play everything lines up and spins no problem.

Jeep-Frame-Rotisserie-1

Jeep-Frame-Rotisserie-2


Jeep #29: Wiring up Lights & In Cab Winch Controls

When I installed the rear fog lights, I did not wire them into the vehicles electrical system.  I wanted to wait until i had fully planned out my electrical system before tackling this job, so I only had to do things once.  The default Jeep rocker switches fade badly over time.  They might have looked nice when the Jeep was new, but no more…  My front fog switch looked like this:

Stock Rear Fog Switch

Stock Rear Fog Switch

I decided I not only wanted to install a rear fog switch, but also replace this old faded thing!  I looked around for alternatives, and finally found switches I really liked.  They are Carling Contura V Laser Etched switches.  These switches are sealed switches originally for marine applications, so not only are they great looking, they should last a long time, and bonus they are resistant to water, being rated at 30 minutes submersion under 1 meter of water!  They are a little expensive, but you can get tons of different options on the switch face, and color of illumination, and as John Hammond would say “Spared no expense”.

The stock mounting panel, seen with the switch in the photo above, has 3 switch cutouts already, only the surface material covers them, so I knew I wanted to install my new rear fog light switch adjacent to the existing front fog switch.  Hmm? What to do with the third switch location.  I decided to add an in cab winch control.

With decisions made on the switches I had to plan out the wiring.  Complicating matters is that after I installed the front fog lights, the stock headlight switch was showing its age and wasn’t dealing well with the new fogs.  The YJ has the front fogs wired such that they are controlled through the headlight switch.  The stock front fog lights will only work with the headlights on, but not the high beams.  After I installed the front fogs, I was testing them , and after a few minutes all the jeep lights would shut off for a bit, and then turn back on.  When I researched what was going on, turns out the headlight switch, when it gets old can’t deal with the extra chore of controlling the fog lights and headlights.   So I decided I would wire the front fogs independent of the headlight switch, so I could actually use them, and could use them no matter if I had the headlights on low, high or off.

My final switch wiring thus needed to be:  An ignition controlled power feed, so the switches only work when the ignition is on, A power feed for when the dash lights are on(to control the switch lights), ground wire( for the lights in the new switches), a front fog control wire(low voltage, that feeds a relay), a rear fog control wire(low voltage, that feeds a relay), A winch in control, and a winch out control (both controlling the winch solenoid).  Its a pretty good bundle of wires, and the power and ground feeds need to go to each switch.  I wired this up and made a mini harness, with a 9 pin plug. (7 wires, 2 extra spaces just in case 🙂

Switch Harness

Switch Harness

With the Harness made, it was a matter of running all the wires in the jeep to all the proper locations, and tapping into the correct lines.  Very time consuming task, but when finished I was able to feed the new wires either into existing wiring looms or where I had a lot of wires (running through the engine bay, I added a new run of split loom, so it looks like it belongs there, and keeps the wires safe.  With all of that finished, I wired these into the other side of the plug, so I can now unplug the switch panel if I ever need to work on it, or if I need to get into the dash for any reason.  With it all connected, I tested it and it all worked, so I reassembled everything.  Here are the final results.  Excuse the dirty dash as the Jeep hasn’t had a spring cleaning yet, its dirty from sitting most of the winter!

Switches Installed

Switches Installed

Switches Illuminated

Switches Illuminated

Jeep #12: Preparing the Frame and Body

It’s been a year and half since I got that new frame, and about 8 months since I started tearing down the Jeep. Well. Its finally time to show some new progress on the project!

I’ve been slowly doing little bits of work to the Jeep body and frame. Removing body panels, removing the dash, disconnecting hoses, draining fluids.. etc. I am now at a point where I am almost ready to remove the body from the old frame. The body currently only has 1 or 2 bolts holding it down, and a few linkages and things to remove from the firewall. Here is how it currently looks:

jeep-body-stripped-down

It wouldn’t be wise to dive right into removing the body right now though, as I have no where to put it. I could do a few things to it, but then it would be waiting for the engine and new frame to get finished. So I decided to move on to the new frame. I was originally planning on not doing anything major to it. It is in amazing shape for being 20 years old, but it could certainly use some new paint. I decided to strip the frame down to just the single metal component. I will be picking up a soda blaster and stripping the frame down the best I can, and then coating in rust encapsulator and chassis black paint. Here is a look at how it currently looks:

jeep-frame-stripped

After the frame is done, I will have to find new Dana axles (mine are horribly rusted too), and then will install the brand new lift kit (1.5 inches) to the frame. Once that is all setup I can move on to the engine, and then the body. The body will also get the rust treatment on the bottom, and some body panel repair in the back. Some of the parts will be painted sand beige poly before being installed, but the main body will be repainted after being installed back on the frame.

Jeep #29: Finishing Up Details

I’ve been tinkering with the jeep over the past 2 months, and hadn’t had a chance to update my progress here.  Mainly having fun during summer driving the jeep!!!

Keen eyed observers may have noticed on the jeep trip photos I posted, there was a winch installed and the rear fog lights were installed.  So, let me backup and cover those first.

Rear Fog Lights: The original KCs can be hard to find, but a couple show up on ebay every so often.  I decided to go with new lights that are almost duplicates of the original KC lights.  They are by a company called Eagle Eye lights, they are the correct size and color, BUT they come in a chrome housing instead of black.  The ones I choose also had a thick plastic lens ring with louvers.  I removed the louvers from the lens ring and I used spray plastidip to convert the chrome housing into black.  The results look almost identical to the KC lights.

light2s

Winch: I knew I wanted a new winch instead of the 20 year old ramsey winches from the movie.  I read reviews and decided the superwinch lp8500 had good reviews and would look very similar to the Ramsey after I moved the winch solenoid.  At $300 it also came with the correct hawse fairlead instead of a roller fairlead so many winches come with.  I bought the winch mounting plate NOT made specifically for a YJ.  The mounting plate I bought would bolt right up to most trucks, But not the YJ.  I choose this mounting plate because it looked like the ones from the movie.  My neighbor has a drill press, so adding the holes to align with the YJ mounting holes for the tow hooks(which of course needed removal) was pretty easy.    Here you can see what the winch looked like during the offroading trip with the solenoid in the “from manufacturer” location.

winchtrip

Correct BFG All Terrains:  My old tires were at end of life, so it was time to get these as well.  New BFG All terrains from the local Discount tire in 235/75/15 size.

The BFGs and the winch were literally done in the last 3 days before our offroading trip.  I didn’t want to chance my old tires, or getting stuck, so it was as good an excuse as any to get those parts off my checklist.

Since that trip I have also completed the last items as well.

Remote mounting the winch solenoid:  I started this project hoping I could get it done in a day, but alas things went awry!  Mainly the fact that the auto parts stores by me only stock 4 guage cables, and the winch needs 2 guage.  I started by taking the solenoid off and figuring out where under the hood it would fit.  It fits very well over the wheel wheel in front of the stock jack.  I created some brackets from building brackets from the hardware store, and then I found a place online that deals mainly in batteries (marine and otherwise) and they made me up the custom cables I needed.  While waiting for the cables to come in from my online source I painted the bracket and installed the solenoid box, so all I would need to do was hookup the cables when they arrived.  (below pic is waiting for cables to arrive)

solenoid

To remote mount the superwinch solenoid you need 3 cables from the solenoid box to the winch.  I went ahead and also ordered a replacement for the original postive cable from battery to solenoid just to remove all the excess you see in the picture above. All cables need to be 2 guage (straight from the superwinch help line). Once the cables arrived the hookup was a cake walk.

Stock Front Fog Lights: I tried to order original equipment Chrysler/Jeep Fog Lights.  A website dedicated to factory parts listed them as available and also the special angle bracket.  But after placing an order and waiting 2 weeks, I got an email that these parts were no longer available and my $$ had been refunded.  Drat!  However I knew Delta makes some fog lights very similar to the stock original ones (delta 100 clear fogs with the stone guard).  But what about the brackets.  I could simply put a hole through the bumper and bumper mount them, but the originals sit back a little, and I like that look.  My neighbor offered to bring me home some brackets from his machine shop, so I gave him a template, and he delivered brackets about a week later.  Luckily the original fog light wiring was still under the bumper(since this was a sahara and someone had removed the fogs at some point), so wiring them up was simple, and the brackets my neighbor made fit perfectly.    Here is how the Jeep front looks now with the fogs and winch solenoid gone.  DSC_0016sThe old bumper ends were in bad shape and since the brackets to hold the fog lights attach to the same bolts, I also replaced those while I was doing all of the above.  I may need to repaint the bumper now as it looks a bit faded next to the new parts.

Mopar Light Bar:  The light bar for JP 29 has no light tabs and appears to be a solid piece (the originals may have been 3 piece bars, but during painting they may have filled the seam up, while removing the light tabs and painting it).  I had found a light bar on Craigslist, but it was for a TJ, so the mounting holes were wrong, and it had light tabs and was a bit rusty.  Instead of altering it, I opted to find a fab shop to make my light bar, by simply copying the one I had, and leaving off the light tabs.  Removing the old windshield bolts took a ton of work as they were seized up badly, one even needed an easy out after it sheared off.  The fab shop did a great job copying the one I had, and after priming and painting(with plastipdip), I got that installed as well.

DSC_0024sSo Jeep #29 Is now 100% complete.

It still has shiny metalflake vs correct low gloss base color, and the red is all plastidip right now.  When the stars align correctly I will be repainting her, until then its all about the fun!

Jeep #29: Jurassic Jeep Adventure – Off Roading

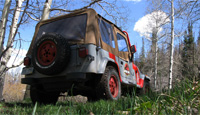
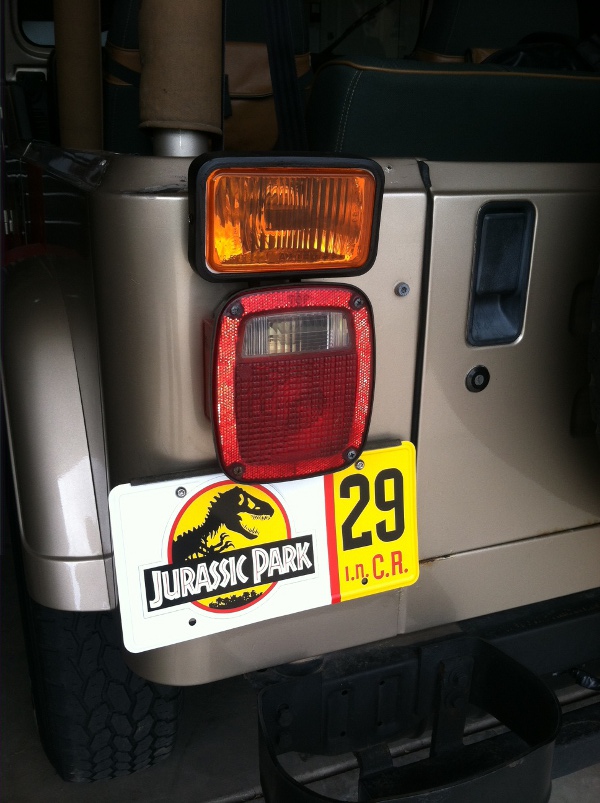
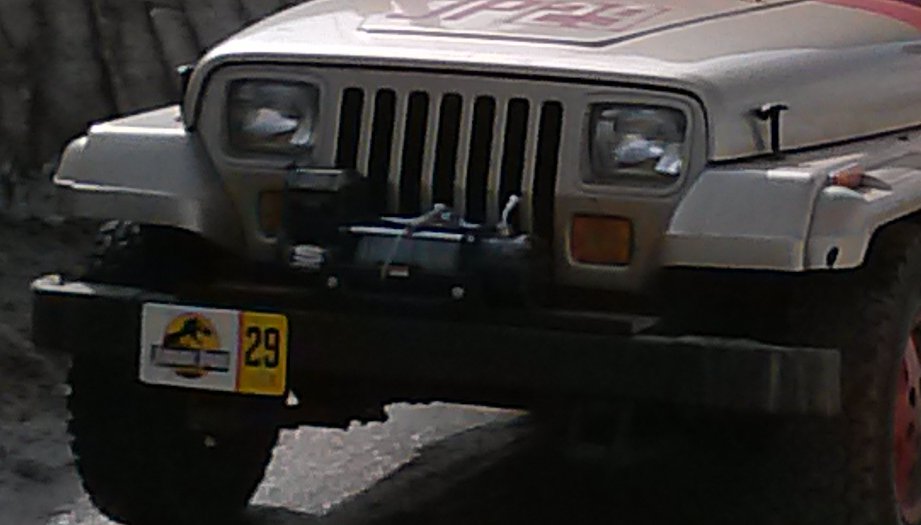
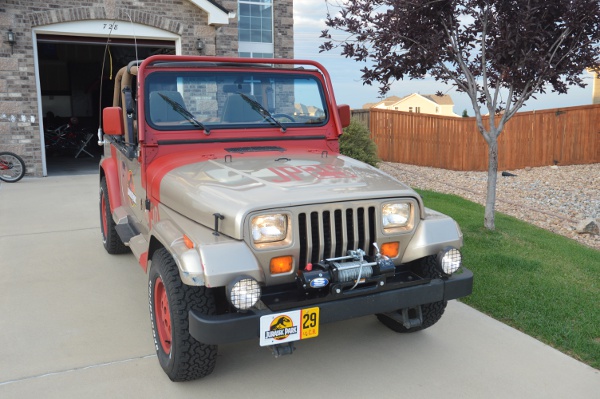
On July 5th , I went on a little Off Roading Adventure in Jurassic Jeep #29.

We went from Eagle, CO to Leadville on Forest Roads and Jeep Trails.  It was right around 50 miles of off road driving.  Here is our route, except the unmaintained jeep trails at point B do not show on the map I used to recreate our trail.  (there is a forest road a few miles away so for about 10 miles of that area the route was slightly different)

JeepRoute

IMG_0218s

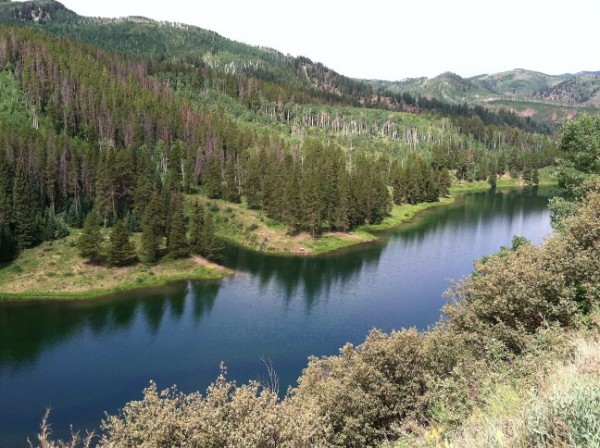
The Roads at the start were basic Dirt Forest Roads.  Beautiful, but any vehicle could have made it over them.  We came upon a crystal clear lake, with a forest service campground around it.  My Wife wants to go back and camp there.

IMG_0122sIMG_0225s

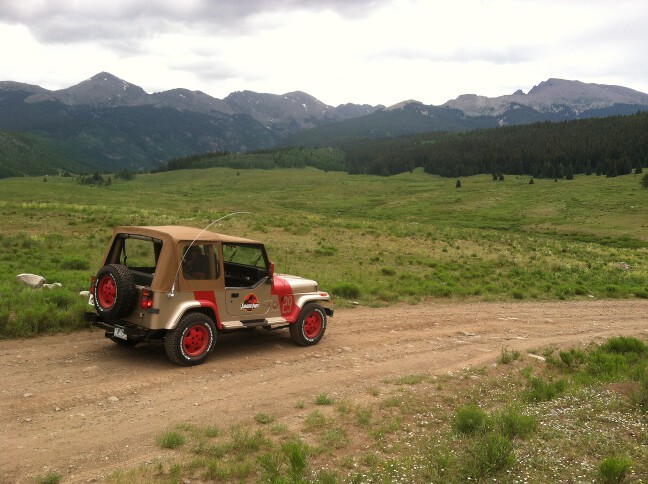
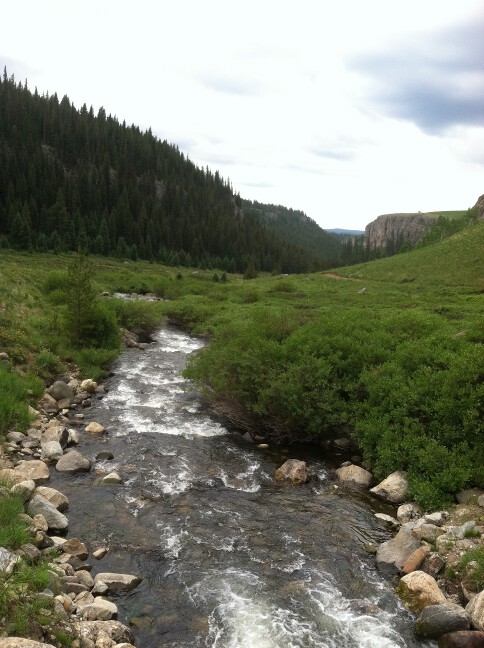
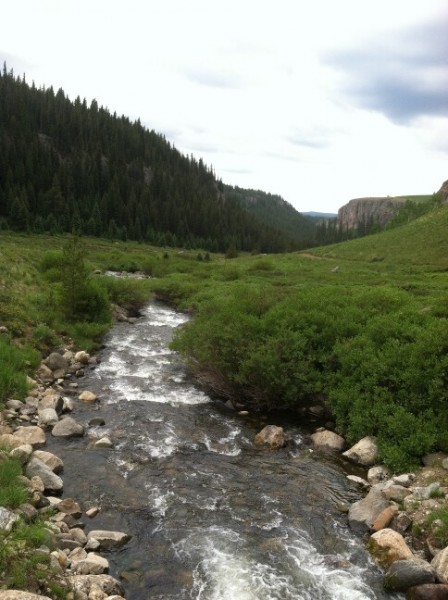
After the Lake we drove along for a while and came to a “major intersection” where we could stay on “Eagle Thomasville rd” which we were on, or try out Burnt Mountain Rd.  The Terrain Map I downloaded showed a gap in Eagle Thomasville, so we switched over to Burnt Mountain Rd.  Just after we switched to Burnt Mountain Rd, we had the amazing mountain view pictured above, and shortly after that we drove over a bridge over the creek below.

IMG_0228s

Burnt Mountain Rd, was a rocky drive, with some tight places in the forest.  My wife was driving this section and she had to attack a tree with the whip antenna to avoid a rock.  the results are below.  I’m pretty sure we need a forest permit to remove forest products so we may be in some trouble with the forest service  😉IMG_0230s


Turns out the terrain maps I had downloaded to my phone for some reason didn’t have real roads on it as once we got off Burnt Mountain Rd, and started over to where the next trail was supposed to start we ran into a real paved road that was not on my downloaded map.  This was Frying Pan Road.  The next trail was supposed to start right about where we hit Frying Pan Rd, but we never saw a trailhead for it.  We stayed on Frying Pan road until it turned back into dirt.  The trail was missed was Frying Pan Ridge trail, but knew by this point Frying Pan Rd was going to the same place, so we just stuck with it.  Soon we made some switch backs and found the Top of Frying Pan Ridge trail.  If we had not skipped Frying Pan Ridge it would have been an extra 10 miles of off road, which would have put us around 60 for the day.IMG_0134s


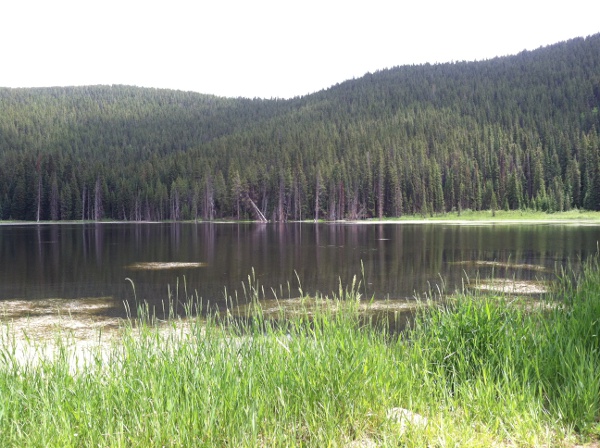
Not far after the top of Frying Pan Ridge trail, we saw our next trail.  This was Diemer and Sellar Lakes Trail.  The trail up to the first lake was dirt up a ridge and back down to the lake, it had lots of dips and hills on it, but no rocks so a fun little trail.  The lake was a nice little stopping point, and we put the top down on the jeep.  This picture is on the road that also serves as the “dam” for the lake.  At the far end the dam just dips down and the water covers the road.CAM00255s


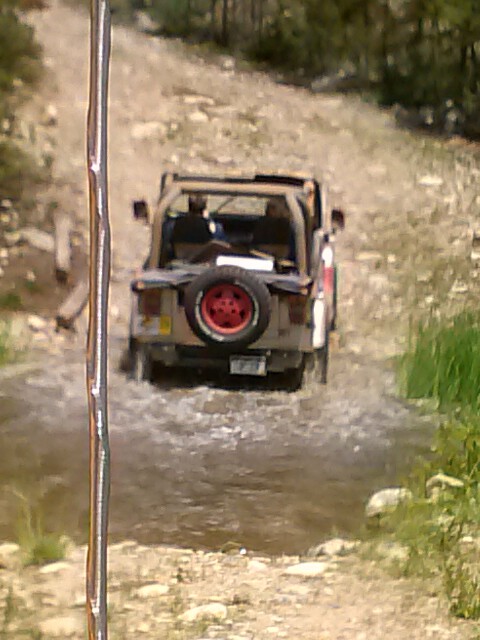
On the far side we could see the trail going steeply up the mountain.  The guide book had said that past the lake was unmaintained jeep trail, and boy were they right.  Going back up to the ridge that we dropped down from was all rocks.  Once back up to the ridge line the trail then turned back east and we followed it another 10 miles, which was unmaintained, with lots of water crossings and places were the water just followed and semi swamped the trail.  Loads of fun.  But if it had been heavy ran I could see this would be some serious trail to make it through.  One particular water crossing was a very deep dip, and I did scrape the rear hitch getting back up out of it.CAM00263s

CAM00268s


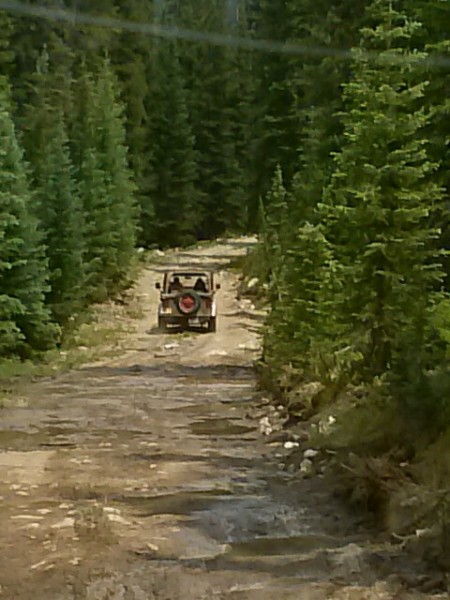
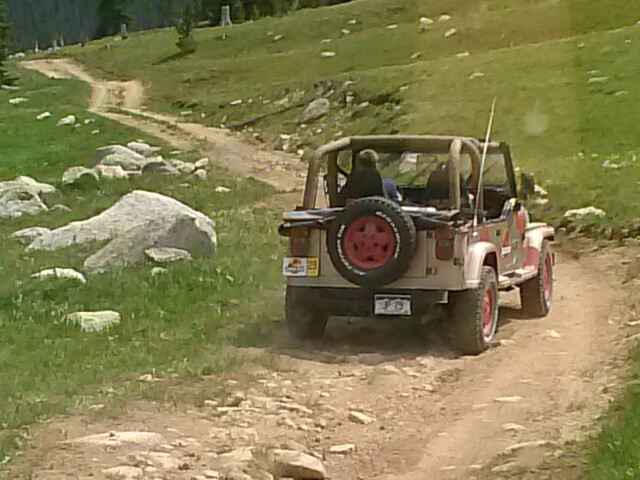
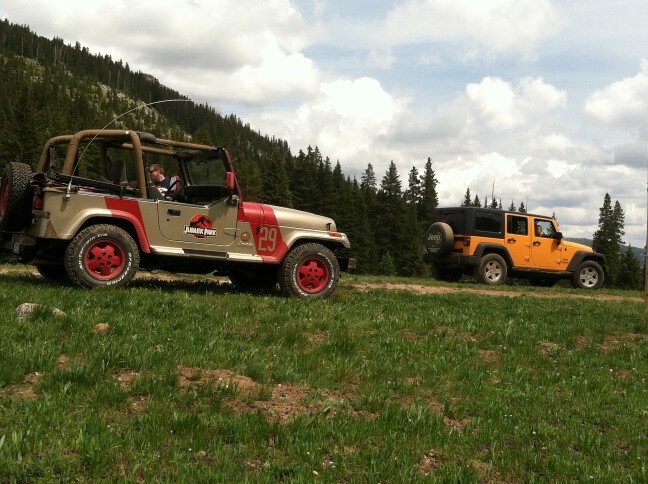
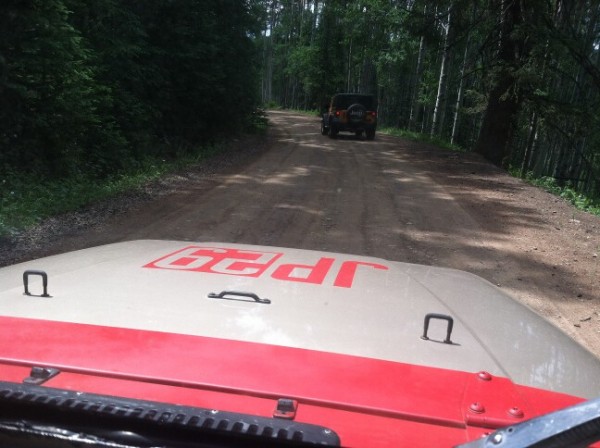
The trail proceeded up out of the trees and got up to a ridge and was a fun drive, and we stopped and admired the views and took a drive break for a bit.  My friends that went along were driving a full Size 2011 Unlimited JK in Dozer Yellow.IMG_0143s


Not long after the ridge, the trail merged back up with a forest service rd, and soon after that it turns into Hagerman Pass Rd.

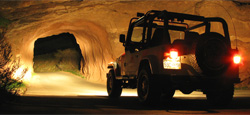
The pass was named for James J. Hagerman, builder of the Colorado Midland Railroad. The Colorado Midland railroad crossed the continental divide through one of two tunnels (initially the Hagerman Tunnel, later the Busk-Ivanhoe Tunnel at lower altitude) near the top of Hagerman pass. It traverses the Sawatch Range west of Leadville, connecting the headwaters of the Arkansas River on the east with the upper valley of the Frying Pan River.  The tunnels are no longer open, but one was used by auto traffic for some time in the early 1900’s.IMG_0147s

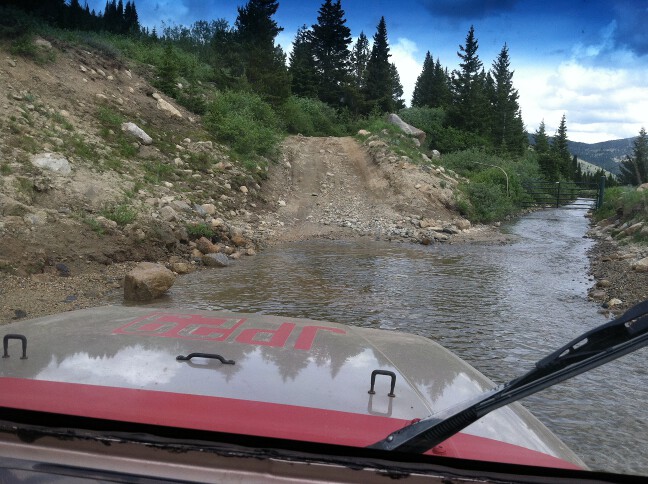
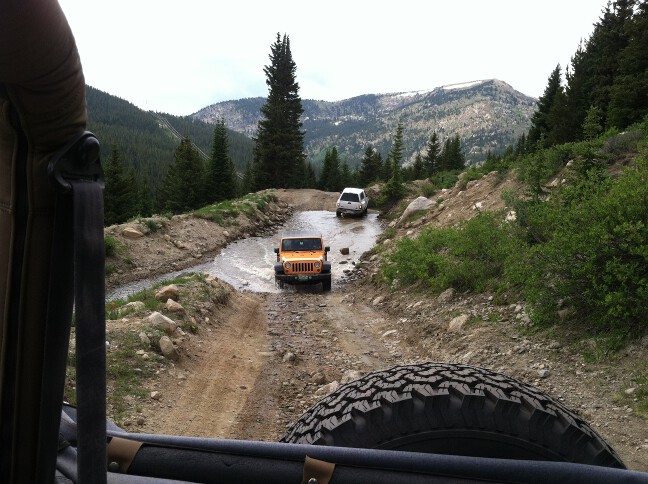
Hagerman pass was rocky and unimproved, though somewhat maintained by the forest service.  The first thing we came to was a water crossing that had me worried.  I got out to see how deep it was since it was very wide.  A lifted truck came to the other side just as I was about to check it out and he drove right across, and parked in a wide area of the water crossing.  With fear of depth behind me, I headed on across.IMG_0148s


The white truck is back there on the right.  and my friends are following my through in their jeep.  After we got through the crossing, the trail turned around a switch back and we got the see the truck make speed runs through the water, turns out they were just playing in the water crossing.

The trail continued up to Hagerman Pass.IMG_0154s

IMG_0155s

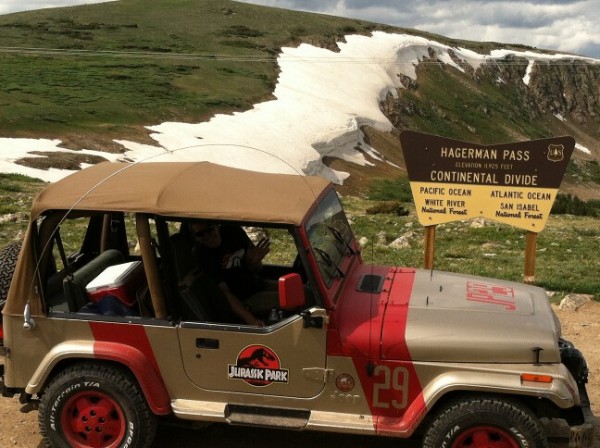
Just after the pass as the trail headed back down the other side we drove through a huge snow drift, twice as tall as our Jeeps, that the forest service had plowed to open the pass road.  I would hate to be the plow driver that had to get a plow up there, as the road on both sides of the pass was a rocky bumpy slow going affair.  The way down was very rocky, though all small stuff, still it made for a bumpy end to the trip.

The road winds around down the other side of the pass and you go right by the end of the old Hagerman tunnel, we were exhausted and starving, so we didn’t get out and explore, nor get any pics of the rocks on the last section of the drive.  The road after the old Hagerman tunnel was well maintained flat dirt road but it felt like heaven after the descent from Hagerman Pass.  When that turned into pavement, I thought we were riding in a Rolls Royce it felt so smooth.

Colorado is a beautiful place to explore and my friends want to make it a monthly trip to do an off-road trail and explore some back country.  When off roading be safe, cautious, go with another vehicle in case of issues, and leave no trace/tread lightly so our back country can remain open for all to enjoy.

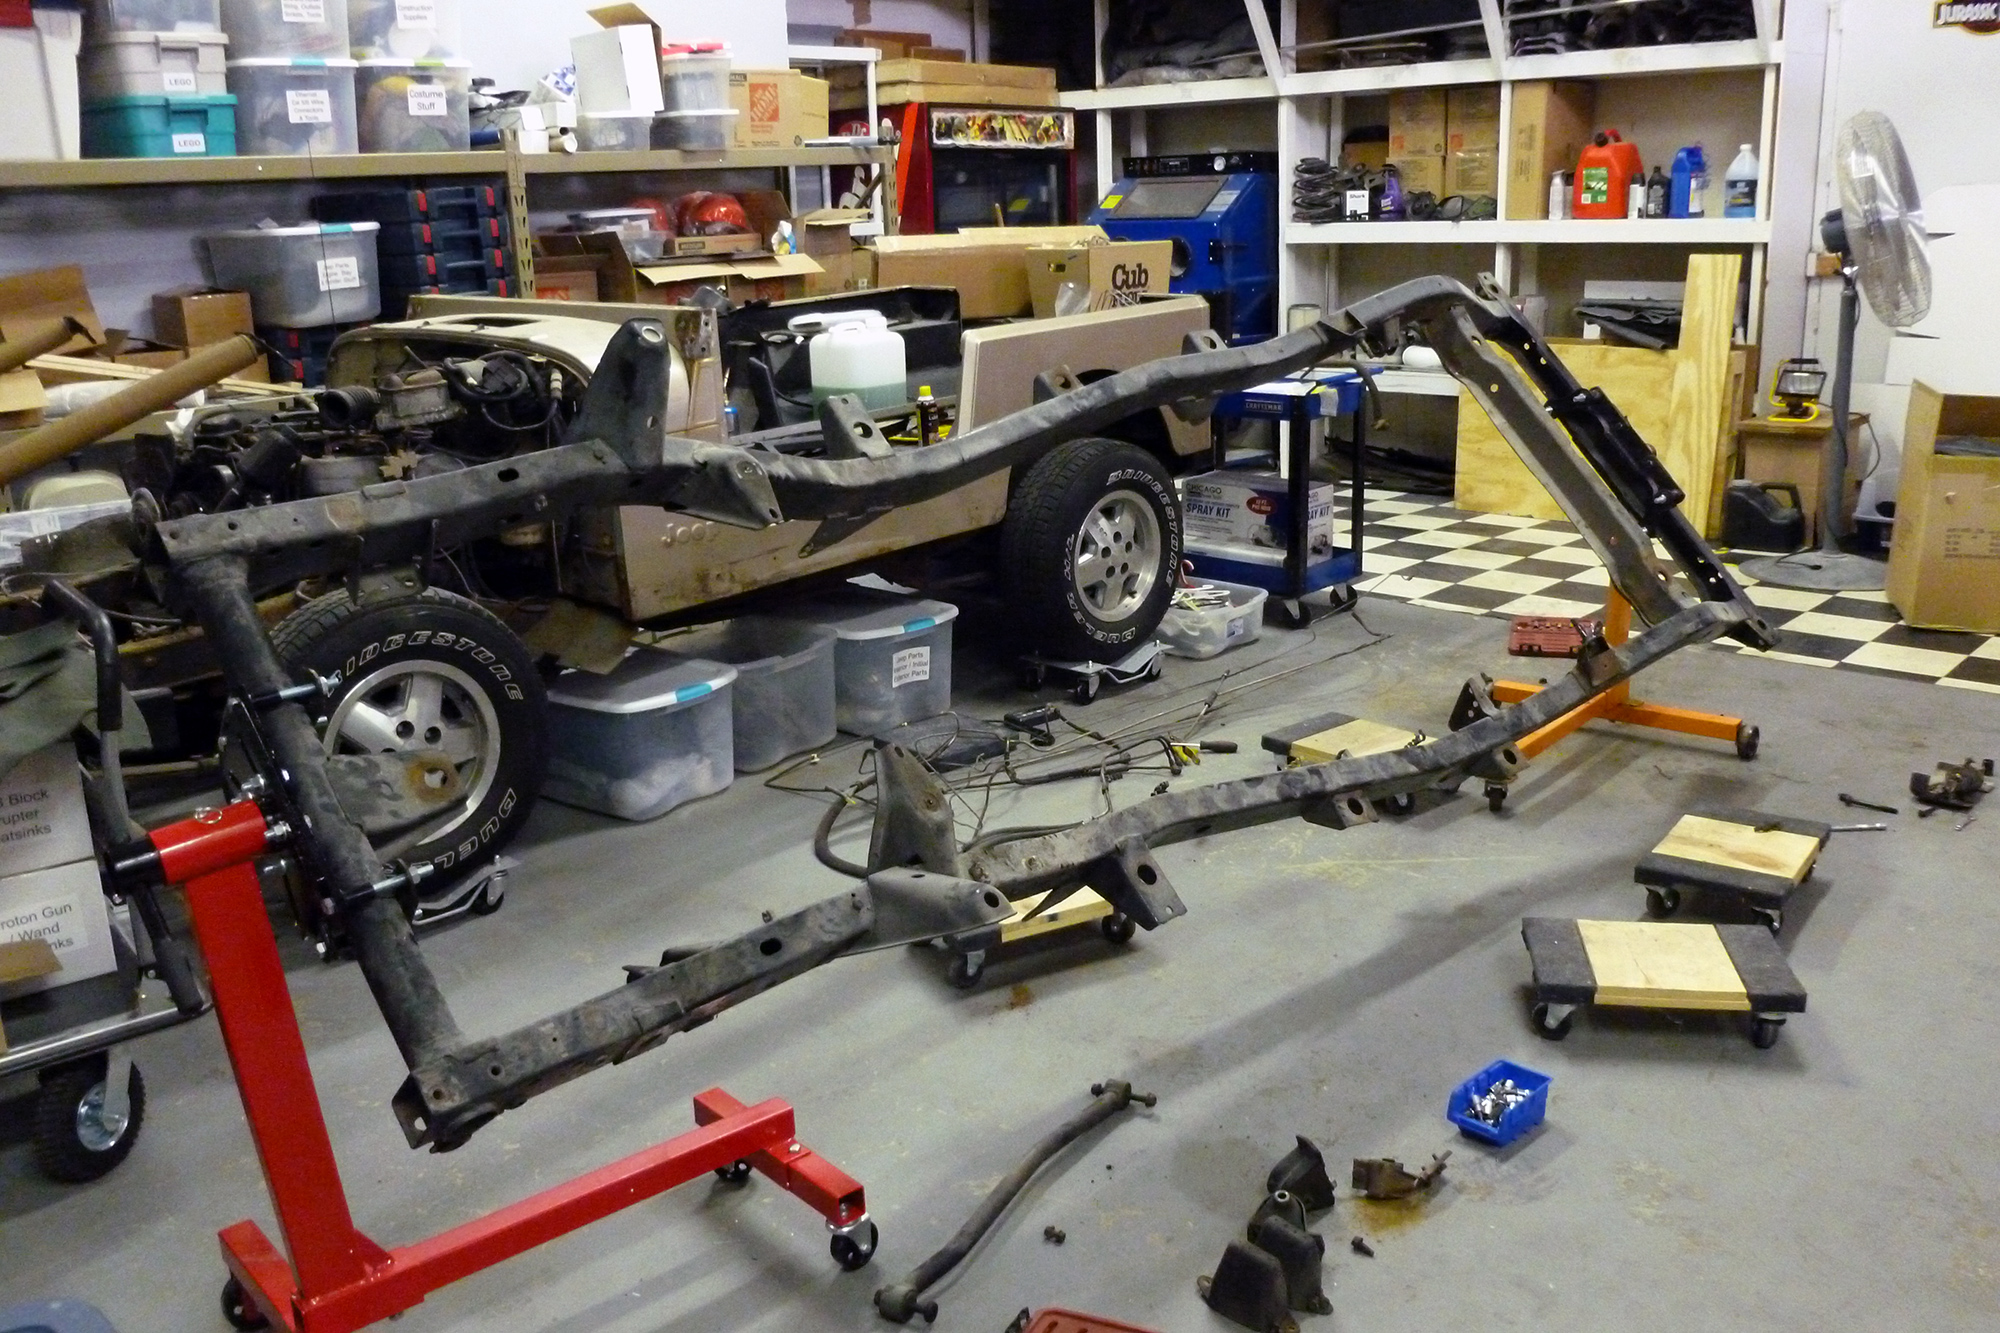
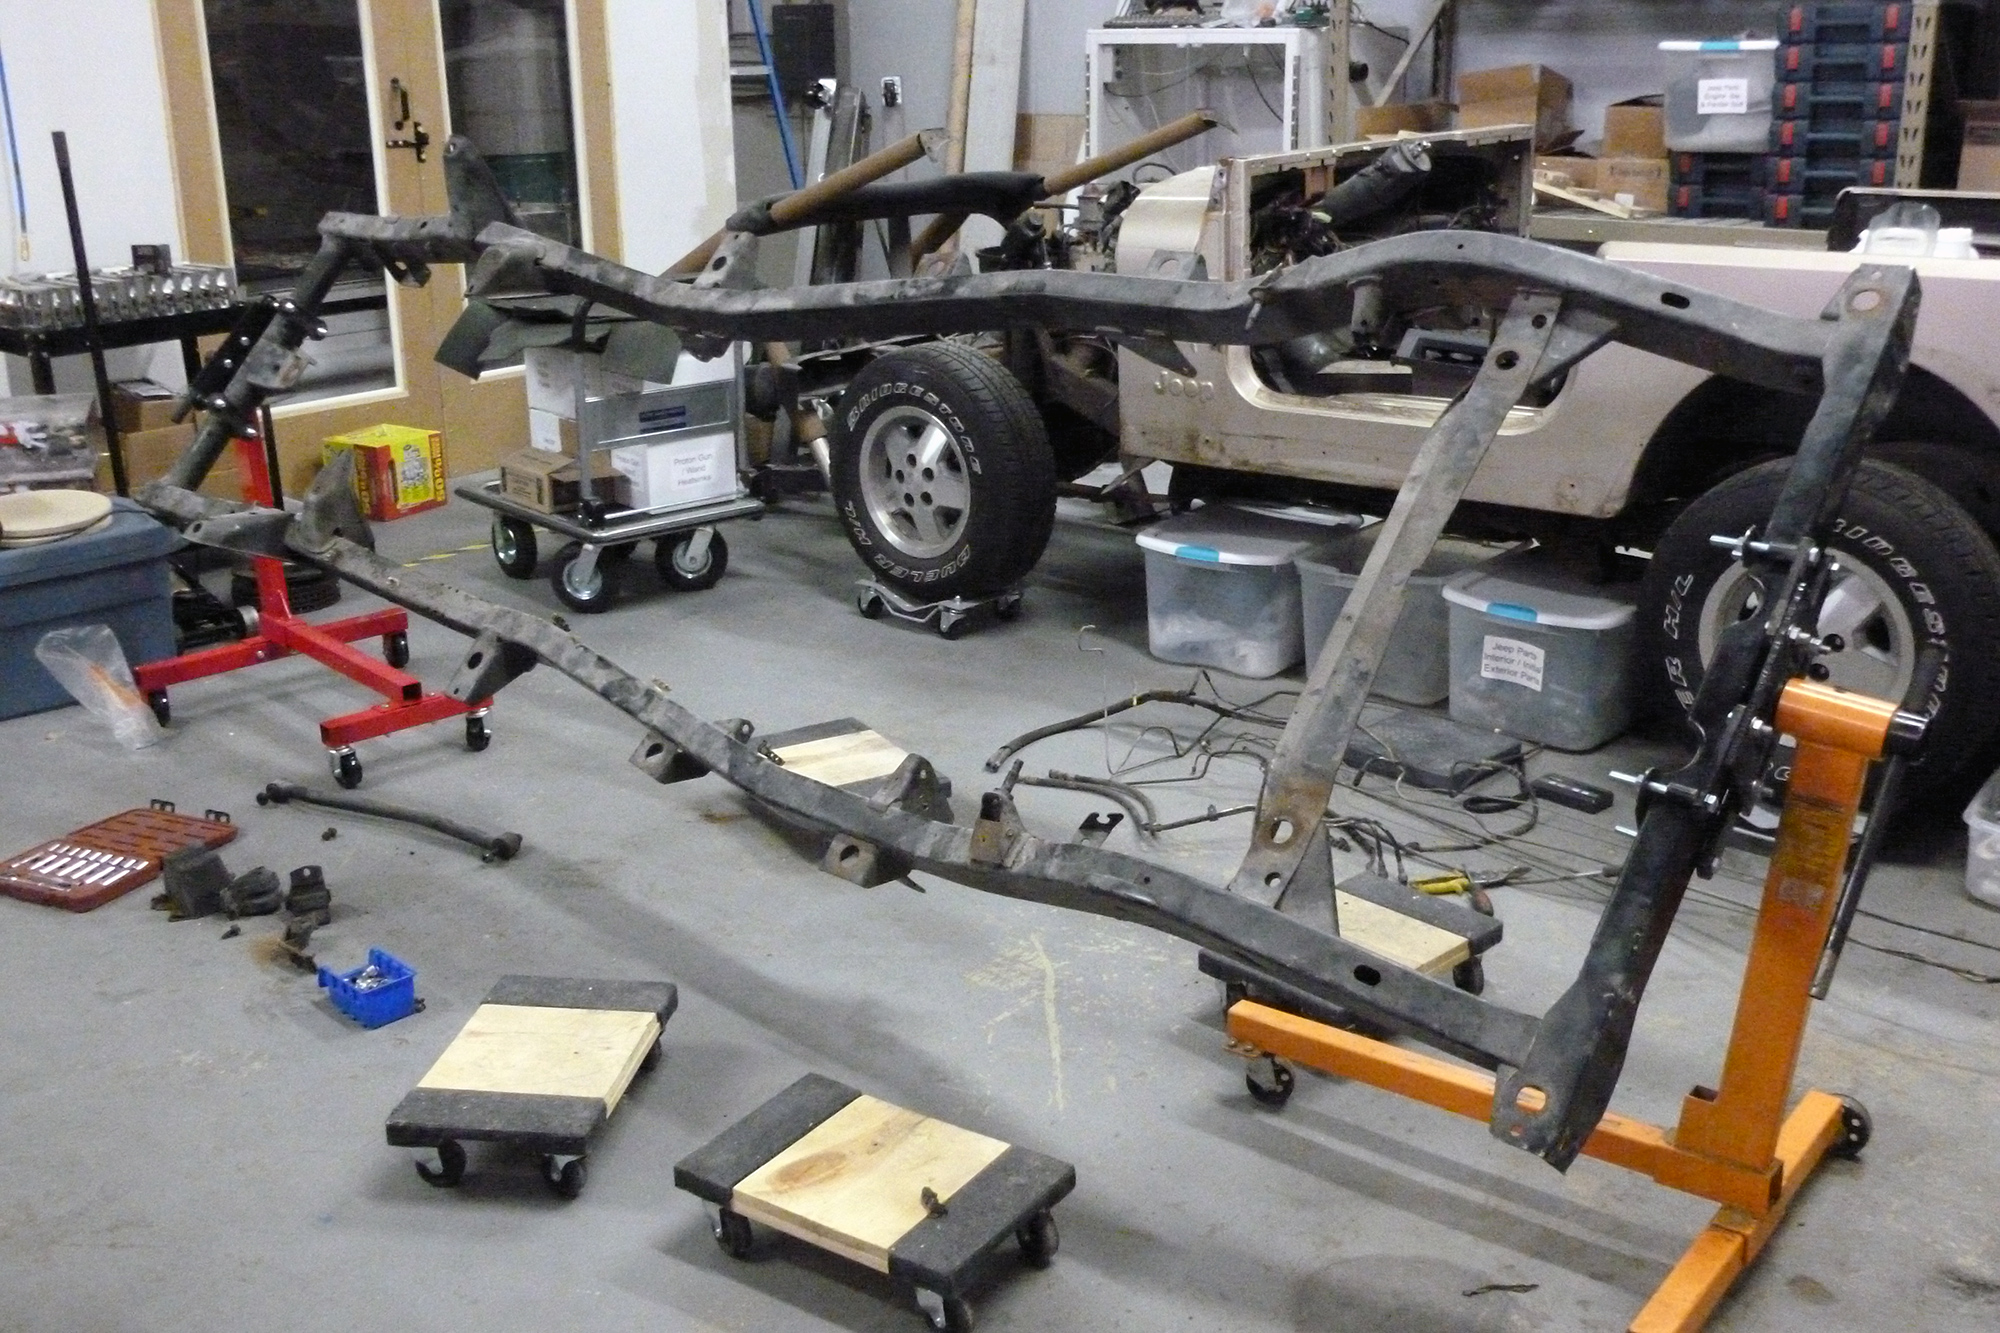
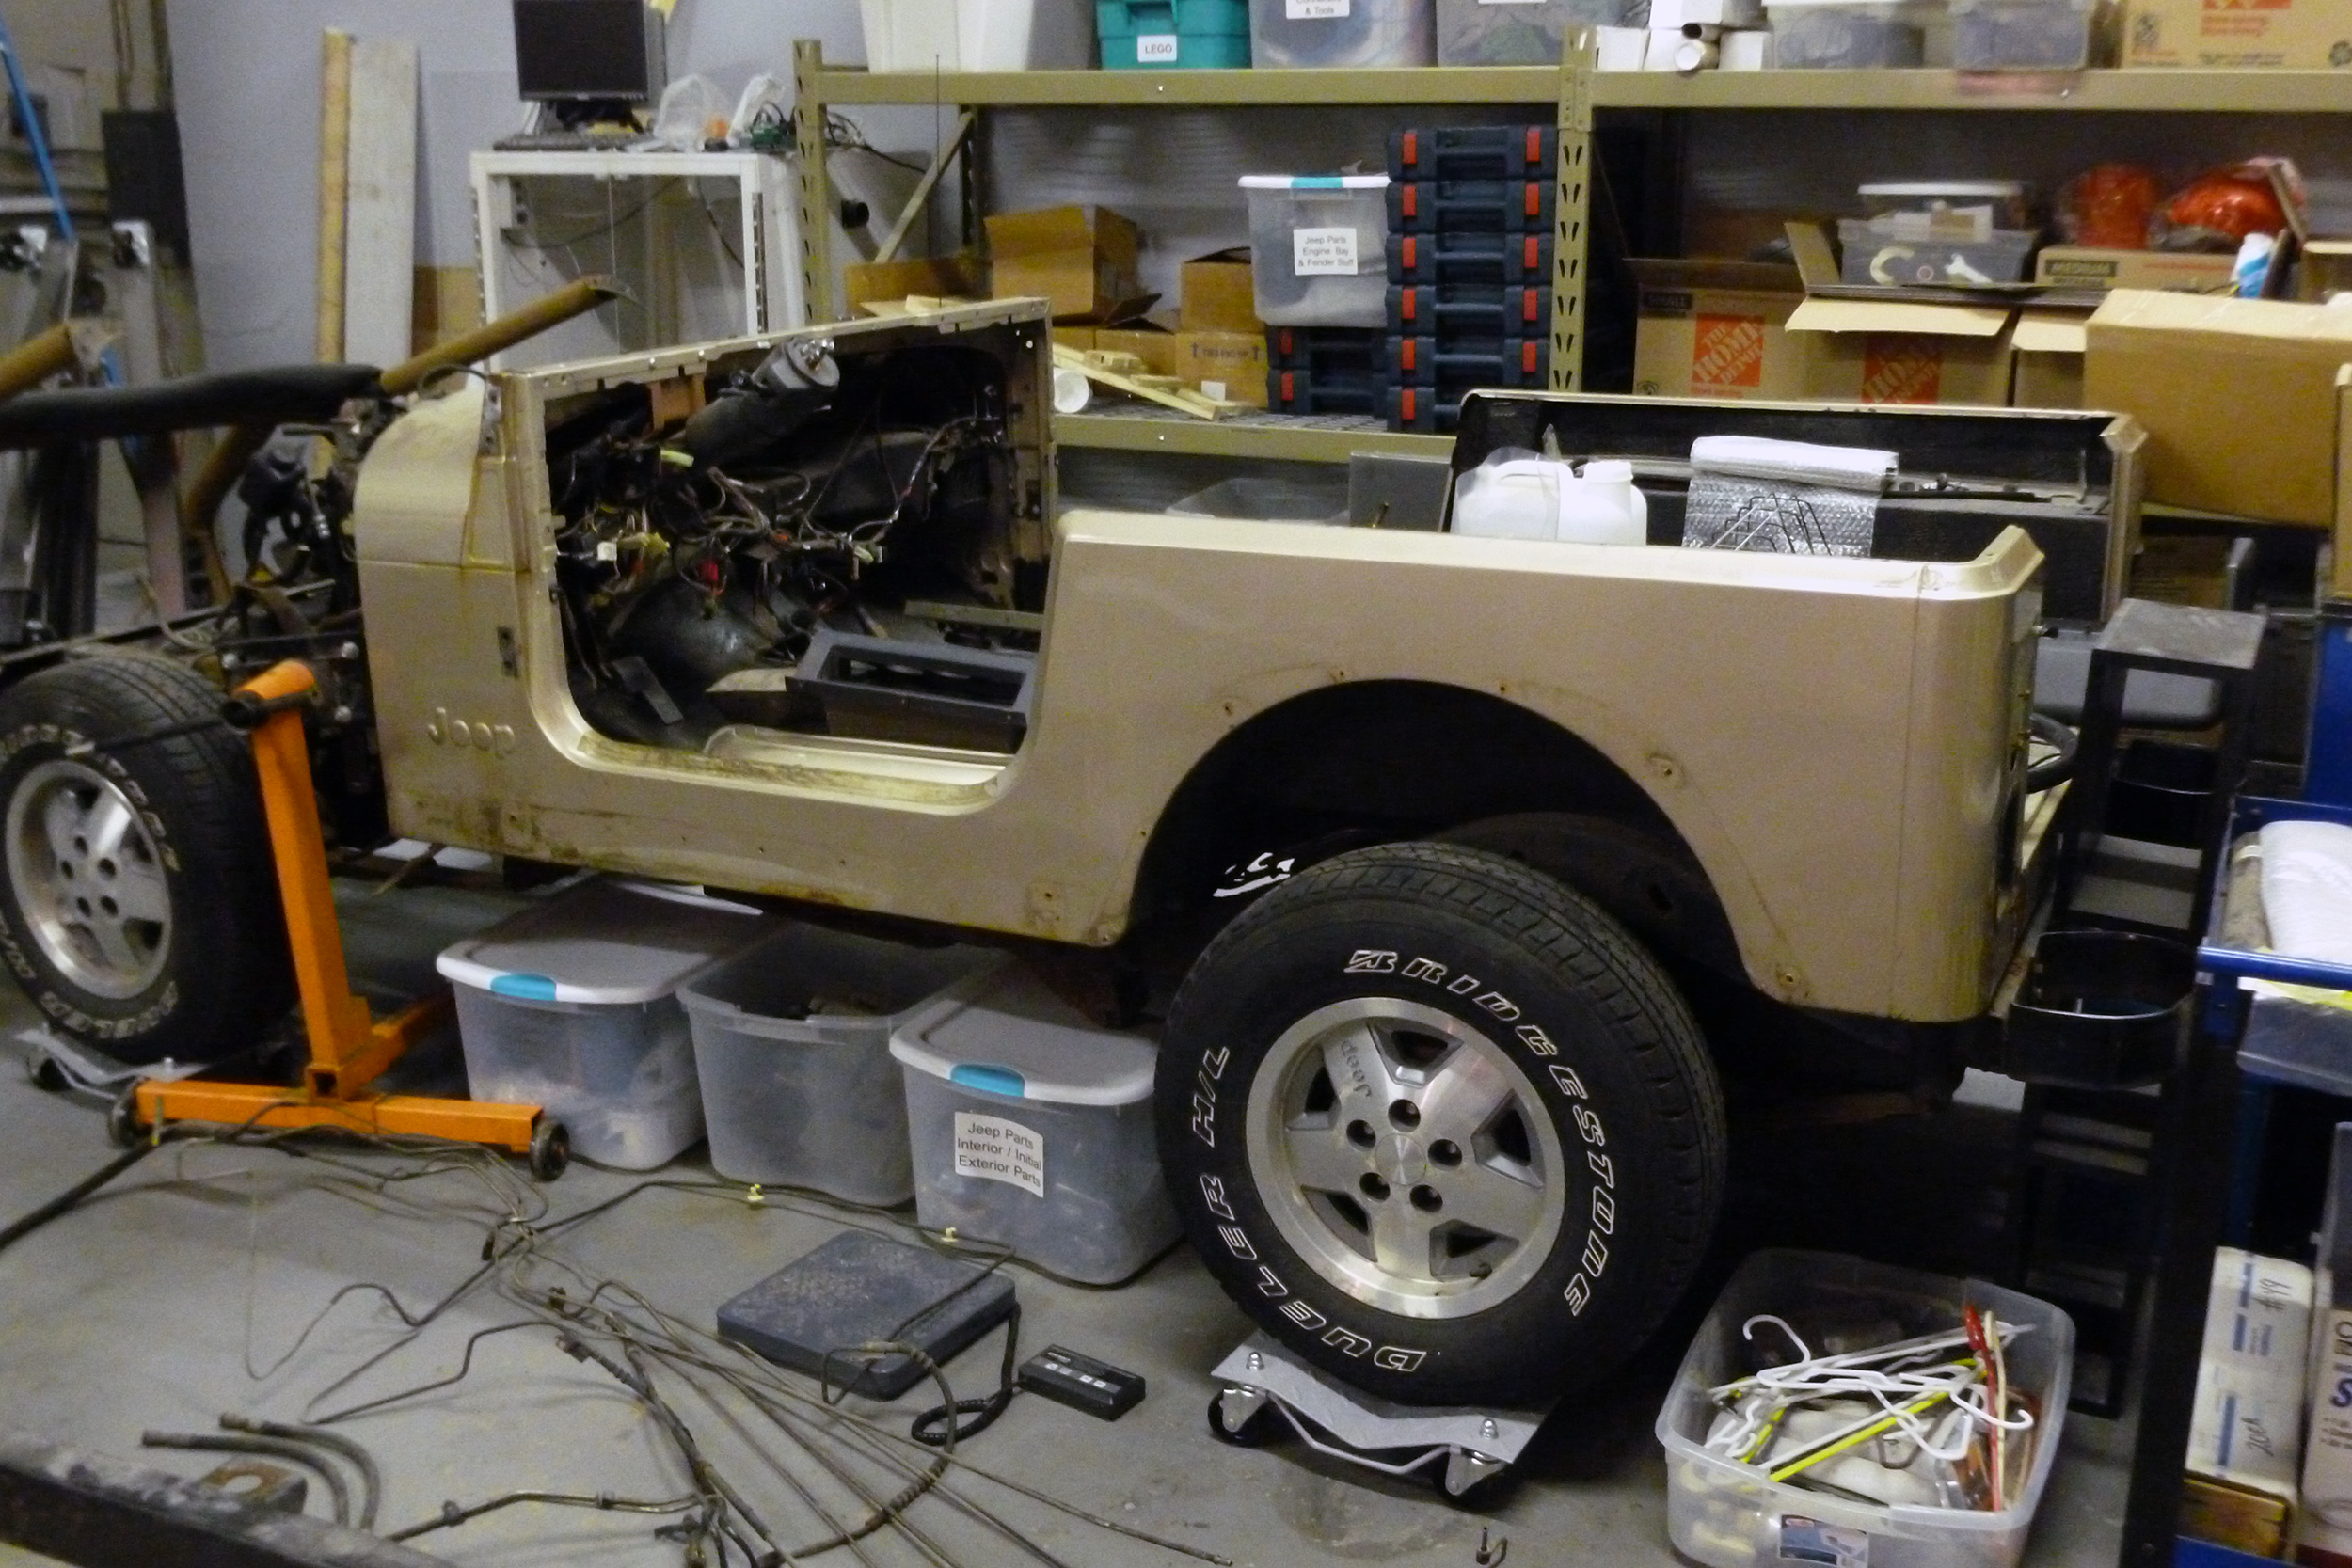
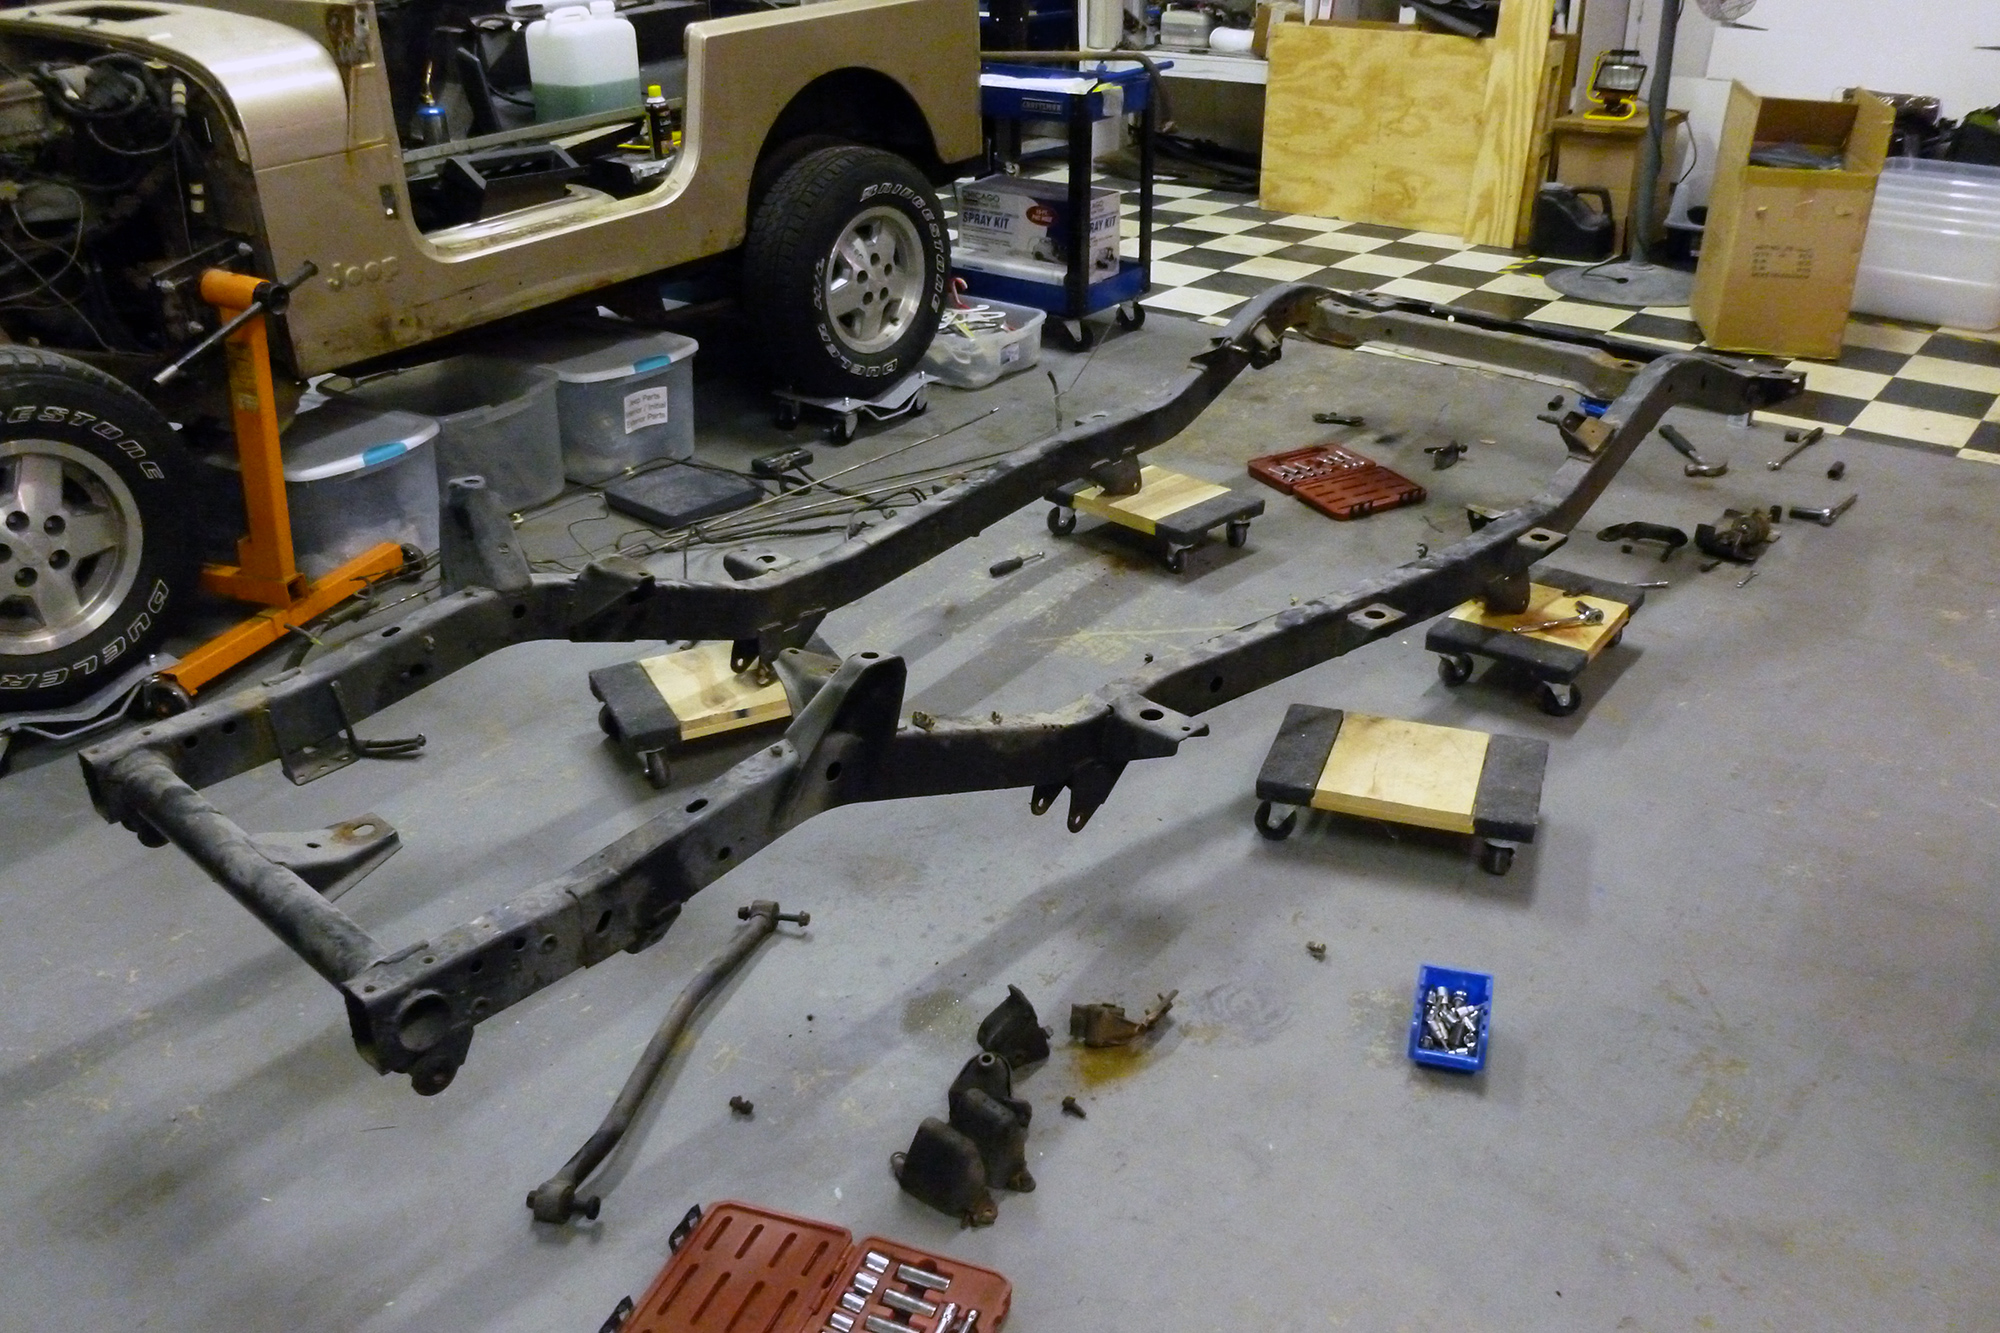
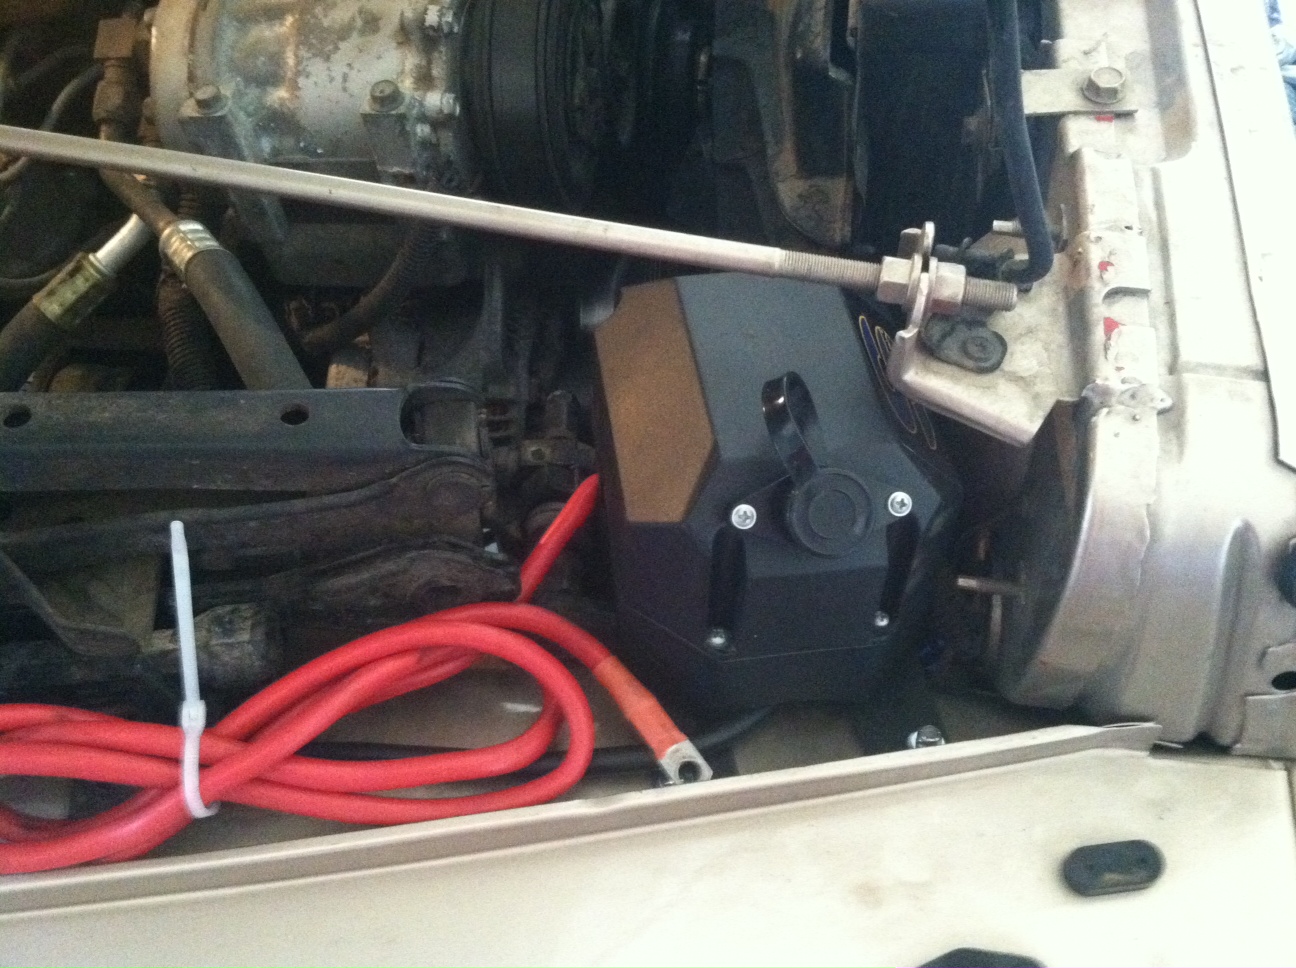
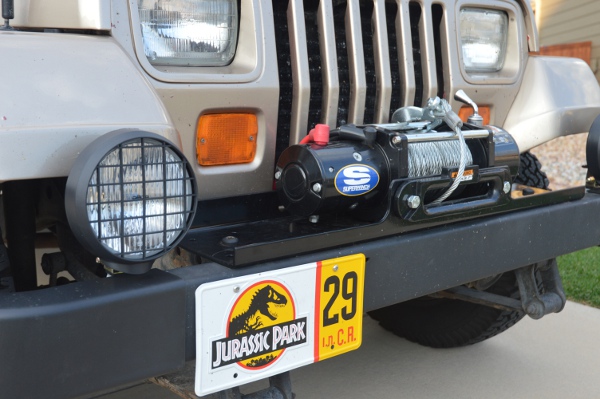
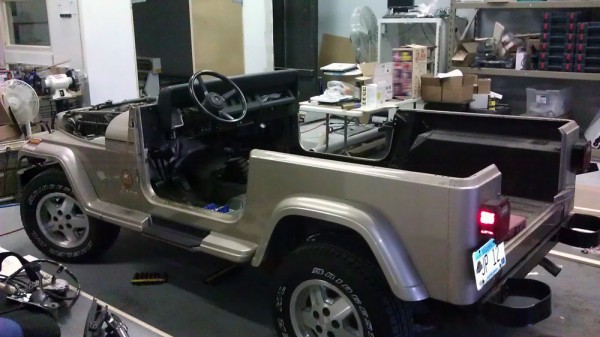
On other notes:  I installed a new Rampage soft top after ordering  the parts I was missing from the used frame I bought, and replacing some broken parts from it.  I also installed the winch I decided closely matched the original Ramsey.    I still need to remote mount the solenoid to get it off the front of the winch to make it look exactly like the Ramsey, but I didn’t have time to do that before this trip.

Jeep #12: Disassembly Begins

Been a long time since I’ve updated this. Kinda sad that I got that frame almost a year ago, and it’s still sitting waiting to be used.

But it shouldn’t be waiting much longer!

In Jan I sold my hardtop. And then the Jeep had been sitting inside for the rest of the winter. A few months ago I moved and Jeep and started to unbolt a few things, but not really remove anything. Earlier this week Kevin (Boomerjinks JP #18) wanted to hang out and I suggested we do some work on my Jeep. He was an hour late, so I started without him and actually unbolted a lot of things. The seats, the rollcage, seatbelts.. etc. I tried to unbolt the windshield, but all those torx bolts stripped out. I ended up doing the quick and simple thing and just cut the hinges right in half. Easy peasy. Finally Kevin showed up to help do some heavy lifting and we got the roll cage, seats, windshield frame and hood out of the way. Enough for a few hours work.

Jeep with no seats, no rollcage

Jeep no hood or windshield

The next few days I would come in and take something off, bag it up and catalog it. Just small items like the license plates, frames, taillights.. etc.

Last night however, I decided I should give a go at taking off the fenders and the grill. The grill I had removed before, so I knew it wouldn’t be too difficult. The fenders on the other hand were going to take some work. I started with the passenger side fender, which is easier than the driver side as it just has the battery tray and jack in the way. After some unbolting, it was out. Next was the grill, which required draining the coolant and removing hoses, but again was pretty simple. The driver side fender is only a little bit harder than the passenger side. There are a lot of electrics, coolant / washer fluid bottles, evap canister and some other stuff to remove before getting access to the bolts. A few hours work total over Friday and Saturday morning and I have this:

Jeep with Fenders off.

Hopefully a lot more progress will be made in the next few months. Kind of sucks to not be driving the Jeep with the nice summer weather upon us… but the faster I get this done, the faster I can drive it!

Jeep #29: First Photos in the Wild

Next to my neighborhood is this amazing overlook.  On a clear day you can see Pikes Peak in Colorado Springs.  I took the jeep over there and took some pics.  Weather didn’t really cooperate, but thought I would share them anyway. 

Jeep #29: Rear License Plates

Mounting both replica license plates in the stock locations means you are no longer legal.  Some states require both front and rear state plates, so check your local laws if you are concerned about being illegal.  Rear Plates are required in all states, and rear plates must be illuminated at night.

My jeep has a hitch, which adds another surface on the back of the jeep.  The hitch is farther back than the stock jeep rear bumper plate (the piece that the bumperettes attach to).  So the tube for the hitch would get in the way of seeing the plate from the rear if I mounted it to the rear bumper plate I had to mount to the hitch tube.   I decided I didn’t want to just screw the plate into the hitch tube, as there would be very little support for the plate, and I thought it would get bent too easy.

To deal with this situation I came up with the following solution:

An all metal license plate frame (I got mine from O’Rielly’s for $10)  mounted to the hitch tube.  A set of “bolt lights” (I got mine from amazon $7).  Since my jeep had a rear hitch, the trailer wiring was in place, so I tapped into the trailer harness for power for the bolt lights.  I used a 2 pin trailer wire($3) to allow me to disconnect the lights if I have need to do so.  Here’s what is looks like.  The plate fit perfectly between the center hitch and the bumperette.

Plate Bracket

Plate Bracket

Illuminated Rear Plate

Illuminated Rear Plate

Jeep Plates

Jeep Plates

You can also see I got my vanity plate from Colorado, and there in the right side of the last shot is my garage “couch” made from the ripped/nasty rear seat I replaced.

Considering my plates, I did also pick up a pack of “security” license plate screws as well.  The pack I picked up had long bolt style, short bolt style, the style that screws into plastic, the plastic tabs, and the special tool.  So all three of my plates now have these special screws/bolts in them, just in case someone thinks they can get a quick souvenir.  😉

Jeep #29: Version 1 – Complete

This week, my vinyl guy came through and handed me the door logos.  The door logos are the same ones #18 is using.  With my stripe being a slightly different color than his (his are paint, mine are plastidip) the red in the logo doesn’t match the stripes perfect.  However, being as this is “temporary” until I save up enough to do a full repaint, I’m not going to worry about it.  But he accidentally printed another hood JP18 instead of my JP29.  Instead of having him redo it, i decided to just make a stencil and plastidip the hood logo same as I did on the side numbers.  I got that done friday night.

Today, I installed the Whip CB antenna.  Since I don’t have my light bar on yet, and may not until I do full paint, I attached it to the windshield with some zip ties for now.  Not elegant, but functional.  There was no actual CB in the movie cars, and I don’t have one, so at this time I am not worried about the antenna grounding.  I’m not sure if I will get a CB or not, so for now (as in the movie) the antenna is just for looks.

I also installed, and wired up a license plate relocation and lights for my rear plate Colorado plate, which my custom JP 29 vanity came on friday. I will detail what I did for that later.  For now here are some images of JP29 in her Version 1.

In these images, you  can see some of the existing paint issues, and why I need to do a full paint job on it.

JP 29 Ver 1.

JP 29 Ver 1.

JP 29 Ver 1.

JP 29 Ver 1.

JP 29 Ver 1.

JP 29 Ver 1.

Jeep #29: Stripes – Temp

Money has been tight, and I don’t really trust myself with painting in my garage. Between Fumes and knowing that painting can be tricky. I figure painting is like drywall work, sure I can do, but I’m not as fast or a good as someone who does it for a living. So I have started saving out of each paycheck till I have enough to paint it 100% correct. Since my jeep is currentl champagne, which is very close to the correct sand beige, I could get away with only painting stripes until I have enough to do it correct.

I stumbled across people using plastidip (you know the stuff you dip tool handles in) in cans or sprayable gallons to paint cars. It is quite fascinating really. I decided to give this a go. I researched on youtube and on the web and found a place dedicated to using plastidip on cars, dipyourcar.com. You can order all the supplies from here and I got good customer service as well as dedicated forums to share information about using plastidip on cars. You can also special order colored plastidip from lowes and probably home depot, but I didn’t ask at HD, only Lowes, you have ask at the custom service desk at lowes, and a manager actually had to figure out what needed to happen, but I wasn’t ready to pull the trigger yet when I found that out, and ended up ordering from dipyourcar.

I plastidipped my wheels 2 weeks ago as a test. They came out really well.

Wheel "Painted" with plastidip

With my test done, I decided to give the stripes a try. Using plastidip is very different from paint. If you screw something up you wait an hour or so and can peel it off. Or if you know you messed up and its still wet, just wipe it off with a paper towel and start over. It is temperature sensative in that it will behave slightly different at different ambient temps when applying. Getting the right coverage per coat is a learning game. Lots of the tutorials suggested 3 coats, I ended up having to do 5-6 light coats to keep from getting runs. You also have to pull your masked line WHILE the stuff is very wet, otherwise it wants to peel off all of your plastidip.

There isn’t as much overspray as using spray paint, which made painting in the garage much easier, not having to cover every spec of the garage. Also as long as I kept the garage door cracked about a foot, the fumes didn’t migrate into the house. I spent a long time laying out the stripes to get them “right” in my book, and then masking everything. Then I got too thick a coat on one back stripe, had to peel it and respray it, and the other back stripe I got to thin and then when I pulled the masking it didn’t leave a clean edge, so I had to peel it and respray it. In all I probably spent 12 ish hours on getting my stripes on. So.. Here they are:

Stripes are Done

After getting the stripes done, and painting the mirrors, I installed the replacement seats.. wow they are sooo much more comfortable than the nasty old ones. I have talked to the guy who did JP18’s door logos, and he is making me a set of door logos and the hood numbers. I did the side numbers as a stencil in the plastidip.

I am calling this JP29 Ver1, since I will be updating this to correct paint in the future.

This photo does a little more justice to the red color of the plastidip, as the sun angle was a bit better, but I didn’t have the doors back on in it.

© 2010 - 2024 Jurassic Jeep - Created by AJ Quick - Jurassic Park is a Registered Trademark of Universal Studios & Amblin Entertainment, Inc