JurassicJeep.com
About  |  Jeep #12  |  Jeep #18  |  Jeep #29  |  Reference  |  Shop  |  Forums

Jeep #29: License Plates

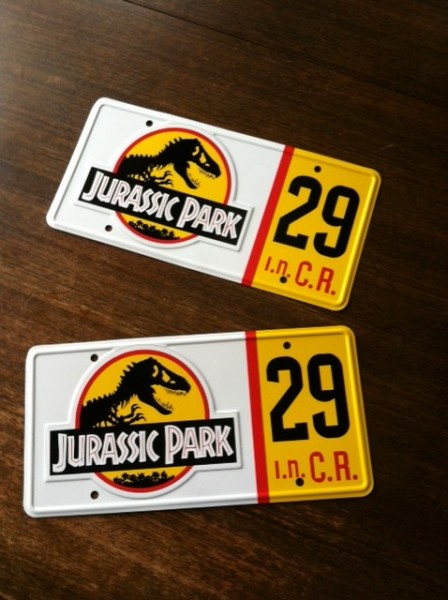
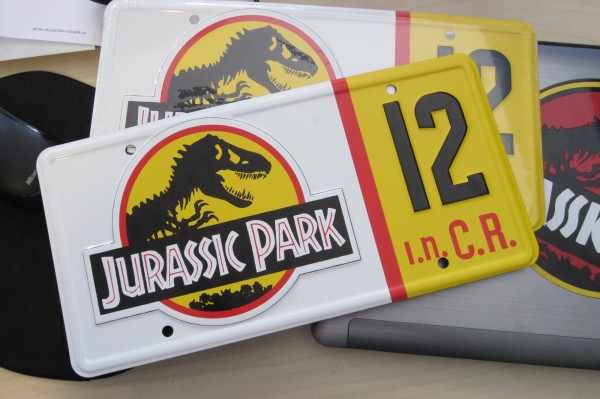
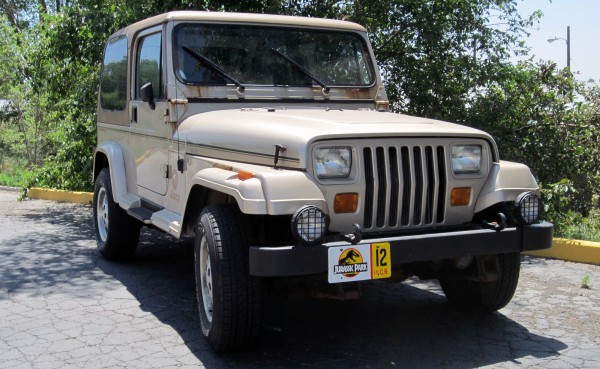
Celebrity Machines makes Jurassic Park Plates, in #12, #18, and blank.  Since I am doing #29 I had to order the blanks.  I received mine a few weeks ago, but I was waiting to be sure my “vanity” plate from the state was approved.  I got the letter yesterday that JP 29 is now my license plate, so I went ahead and finished off the blank celebrity plates with #29.  If you order blank plates from Celebrity Machines, tell him what number you want and he will include the 3m numbers you will need.

The numbers are 3″ tall by 1 1/4″ wide.  The yellow section is 3 1/4″ wide(from red strip to emboss).  So 2 1/2″ for numbers and 3/4″ for free space, and you get 1/4″ free space on each side and inbetween the numbers.  For height placement, with the screw hole it seemed better to have more “gutter” at the top the above the lettering i.n. C.R. (Isla Nublar/ Costa Rica).  It ended up about 3/4″ at top and 3/8″ at the bottom.

They look great, now I just need to wait for my state plates to get made.

Jeep #29: 20 Year Old Hoses!

Last Month we had a batch of nice weather on the weekend.  Since I had not driven the jeep since winter started I decided to pull the Jeep out of the garage and drive her around a bit.  I pulled her into the driveway and let her idle for a while making sure she sounded alright and checking for fluids.  Nothing in the front.. That’s weird there is something dripping right by the rear axle on the left(driver) side.   FUEL.. Ohh no.

I inspected all the lines.  There is a rubber fuel line from the gas tank that goes between the body and the frame and then connects to the hard lines before the fuel filter.  The leak was coming from one of these lines just after it passed the frame/body grommet.  The lines had deteriorated and sprung a leak.

The next day after researching what all was going to be required of fixing this, I dropped the fuel tank.  Dropping the fuel tank was quite difficult, as there is very little clearance to drop the 20 gallon tank of the sahara.  Here are the steps: Remove the license plate and plate frame. Remove trim around filler. Remove plastic cover under rear corner to access internal area of fuel filler. Remove filler and vent hoses from tank to filler. Support tank with jack. Remove 4 nuts along rear of gas skid plate (only need socket wrench on nut), and 3 along front of skid plate(will need monkey wrench on top of bolt and socket wrench on bottom). The tank is now Free of the vehicle. Slowly lower the tank with your jack.   Try to look on top of the tank and make sure all the hoses and electrical to the tank are free and long enough.  Some write ups say you have to unplug the wiring, but my wiring was long enough that I didn’t have to unplug it until after I got the tank to the floor.    However my vapor line was way to short and it broke the vapor T being stretch as the tank was dropped.  (It will get stuck at this point. just a warning!) The passenger side gets hung up a bit on the exhaust hanger/exhaust pipe, and the driver side fill/vent nipples get stuck on the frame rail. I just wiggled and tilted the tank and pushed the exhaust pipe out of the way until it came out.  I wanted to get the tank semi empty so it was easier to handle, so I siphoned out 6-8 gallons of fuel, this was a pain, as the bends in the filler hose are very tight and the hose kept getting caught on the fuel tank’s nipple.  I ended up having to siphon gas after I had removed the filler and vent hoses so I could actually access the tank.   That made this take a lot longer than it probably should have.  I spent 3 ish hours on this.  Penetrating oil was required on the bolts to get them started.

Not only was the fuel line old and destroyed, but the filler hoses were getting bad too.  I ordered the 2 custom hoses that go from the tank to the filler.  (There is a fill hose and a vent hose)  $25 for both hoses.

Here are the old hoses the cracking filler hose on the Left and the dual fuel hoses(supply and return), with the cracks just past the bend on the top hose :
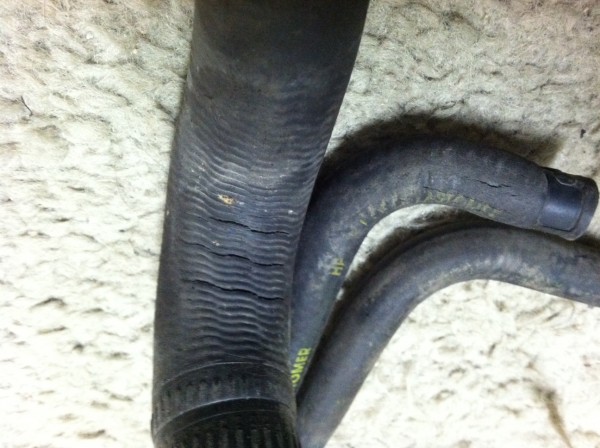
With winter and 2 jobs I wasn’t in a rush to deal with this,  it wasn’t too cold today, so after work I got busy replacing all the hoses.   First I removed all the old lines.  Basic stuff here, hose clamps, and then prying off the hoses.  NOTE:  Make yourself a diagram of which fuel line from the tank to the hard line connects with what.  You don’t want to cross up the supply and return lines.  Be careful when removing the hoses from the hard lines so you don’t bend a hard line by yanking to hard. Getting the old lines out of the frame/body grommet was a lot of hard yanking,  I didn’t do it, but I should have cut the lines as close to the grommet as possible to make this easier.

If you ever drop your tank, and it has never been done before, replacing the filler and vent hoses is cheap insurance and you have to take them off when getting the tank out anyway.

If you didn’t destroy anything these are the Supplies Needed:

  • 2 Special Order Filler/Vent Hoses ($25 for both) They are formed hoses, and special sizes to match the tank and filler.
  • Several Feet of 5/16 fuel Hose
  • Several Feet of 3/16 Vapor/fuel Hose
  • 4 small hose clamps
  • 4 medium hose clamps

I took my hoses and hose clamps with me to make sure I got the right lengths and sizes.  I bought my hose clamps at home depot, the special hoses online, and the generic hoses from the local auto parts store.  Since I broke the T of the vapor line, I also had to buy a new T, but both local stores didn’t have the size I needed  3/16 on the solo side, and 1/4 on both the other sides.  I had to buy a 3/16 all around T, and then straight connectors with 3/16 on one side and 1/4 on the other.    Ugh why weren’t all the vapor lines the same size!

Reassembly:  Basically the reverse of all of the above.  Getting the hoses through the grommet, use some dishwashing liquid or some other lubricant.   The vapor lines the auto store had were a bit thicker on the outside than my originals and were a pain to get through, but the fuel lines were identical so not to bad.  One of the barbs on the fuel tank is bigger than the other one.  Getting the new line on this barb was a real pain, and probably took the most time of anything.  With the hoses reconnected I then had to get the tank back up, I jacked the jeep up to get more room for the method I wanted to try to get the tank back in(which i left it stock height when removing it).  Then I used a jack on the driver side and lifted it diagonally upwards, then reconnected the wiring, and then I then lifted the passenger side with another jack.   It went in with this diagonal method much easier than it came out.  I then shimmied it around until it lined up with the mounting holes, and the started the bolts, but did NOT tighten them.  I then reinstalled the filler and its vent hose.  I was afraid of tightening the tank in case I needed to move it around while getting the filler hoses back on.  Once back on, Tighten it all down, get all the trim back on, and DONE.  About 4 hours tonight (not counting trip to store for supplies)

Started the jeep up, running good and no Leaks!

Jeep #29: Hard Top is Gone.

I bought my jeep with the hard top, thinking I would want to use it during the winter….  I decide to sell the hard top for a few reasons.  1 – My Jeep is a spare vehicle, and I don’t have to drive it during the winter.   2 – I can use that money towards other Jeep parts I still need, IE the soft top, and fog lights..

The Hard top left my house tonight, so Now I get to convert the lift I made for the hard top into a bike hoist to get the bikes off the floor for the winter.

I have not done any other work on the jeep, but have been driving it here and there… that ends for the winter now until I get a top.

During October my family made a trip out to Orlando and went to Universal and Disney.  I got to check out the vehicles in the Jurassic Park section of Universal’s Islands of Adventure park.  The vehicles were not screen accurate anymore.  The Jeep has been repainted, and is close, but has differences if you know what to look for. (font is wrong, stripe is off a bit, missing some parts, etc..) The explorer is completely the wrong color, its purple/maroon not red.. weird.. and the Lost World Mercedes is stripped out (but it is open to weather, so that is to be expected)

The Jurassic Park visitor’s center, supposedly built replicating the visitor center from the movie was really cool though.  I picked up a Jurassic Park ball cap. (not screen accurate, but nice none-the-less) most of the other stuff didn’t catch my fancy.

Jeep #29: Maintanence

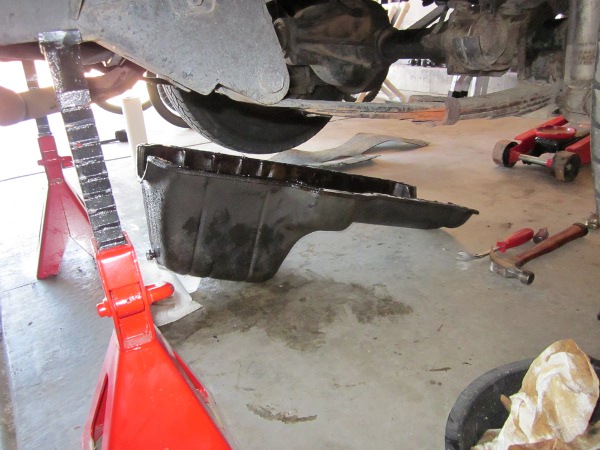
When I did not have the rear main seal addressed when I had the original work done.  I only had stuff that might strand me done by the mechanic I had used.  Today I spent the day dealing with the rear main seal.  I have the Haynes Manual, but there are better write ups online for this bit of work. (I used one from a site called dailydriventj, any web search will get you hits (keywords, wrangler rear main seal replacement))

In a nutshell the process goes like this: Empty Oil, Remove oil pan, remove rear main seal cap, remove rear main seal from cap half, and from engine block, clean mating surface of the rear seal cap, install new rear seal into engine block, then into the seal cap.  Now the important bit, use anearobic rtv on the seal cap, anearobic rtv cures when it has no air, IE after it is torqued down to specs.  Install the Seal cap, and torque to correct specs (85ft lbs), finally reinstall the oil pan, after cleaning any old gasket off, and cleaning both mating surfaces.  Finally refill with new oil, and might as well replace the oil filter, and your oil change is done as well.  It took me about 5 1/2 hours to get it all done. Not counting the break I took to pickup the lightbar I had found the night before.   But its anywhere from $500-$800 to do it at the shops, and the supplies are about $70.  Including oil and new oil filter.

Here are some pics from the process:

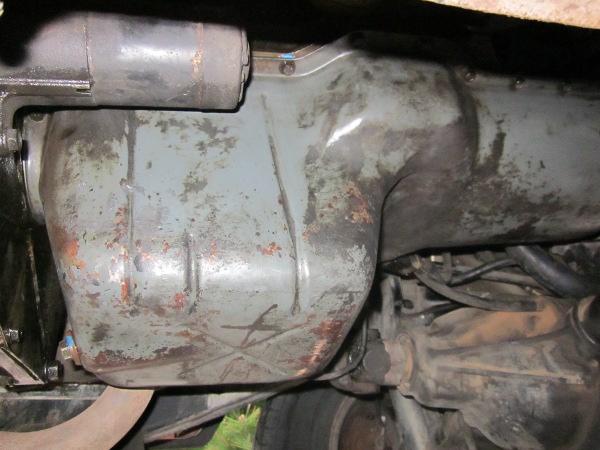
Oil Pan Dropped

Oil Pan Dropped

Half way through process

Half way through process

Reinstalled and cleaned up!

Reinstalled and cleaned up!

The pan still had a cork gasket, so I doubt it’s ever been off before.  Getting the upper seal half out of the engine block was a pain in the butt, that was the hardest part.  But it is a messy job…

Jeep #29: Lightbar FOUND!

Craigslist score..  Only things I had left to source are fog lights, lightbar, and winch, so I almost didn’t check craigslist last night.  So Glad I did.  It is a 3 piece bar, so it may need shortening, as typically these are a bit tall.  But that easier then building one from scratch.  $40!  Also once I got it home I tried lining up the holes, and they do not match the existing bolts, so perhaps this was from a TJ?  I can deal with redrilling correct holes though.

Jeep #29: Restoring Interior Part #2

So For the last few weeks, I have been watching craigslist like a hawk.  And I scored big time.  An independent (not a junk yard or specific jeep parter) in Denver was parting a 95 sahara.  I bought just about the whole interior from him for $400.  The jeep was a hard top, and was wrecked 5 years ago and has just been sitting…  The interior is almost perfect.  there is a single rip in the drivers seat bolster that is about 3/4″ long, little to no fading at all.  LOVE hard tops for this reason.

The differences between a 92-94 Sahara and 95 Sahara Interior are the following: The correct carpet color is green (mine is green already, check), the 95 has spice carpet.  The center console 92-94 is green, 95 is spice. The Dash 92-94 is gray, 95 is spice. The interior door panels are spice in a 95, 92-94 has green, and the pockets on the half doors are all spice vs spice and green trim. The rest is the same.

I got his seats, all 4 seat belts, roll bar padding, and carpet.  He threw in the carpet, when I tried to haggle his price, so I figure I can resell it to recoup some of what I spent, since my carpet is good, and this one was the wrong color.

I needed all this, as you’ve seen the condition of my seats.. ICK!  The drivers seat belt has a cut in it 1/2 way through, I had picked up a junk yard replacement, but it was very faded and looked bad. And the roll bar padding was filthy and wasn’t coming clean, and had some burns/repair marks in it.

My plan, is to not install these items until I paint the jeep, since I will be taking everything out when I paint, I might as well only do all the removal once/replacement once, instead of multiple times.  Once that’s done I’ll sell the extra belts, and seats (if I can considering the shape they are in) to recoup at least some of this cost.

Without further ado: Pics:

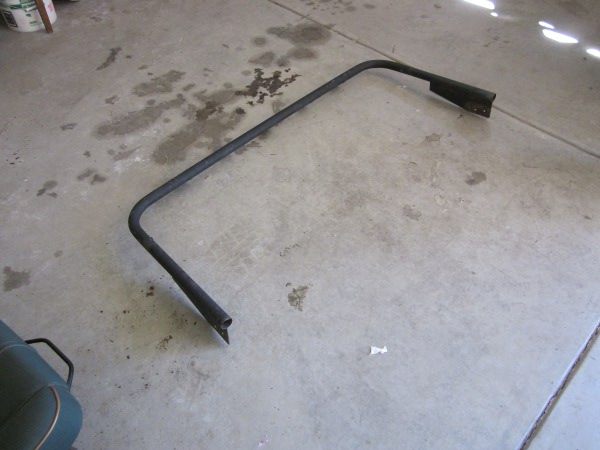
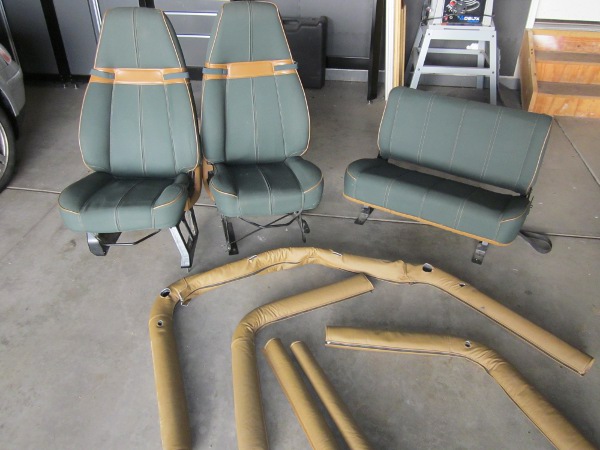
Seats and Roll Bar Padding

Oh and those extra brackets and seat sliders can be sold too.  I’m soo excited about how nice these seats are!  And you can tell how nice the roll bar padding is as well.

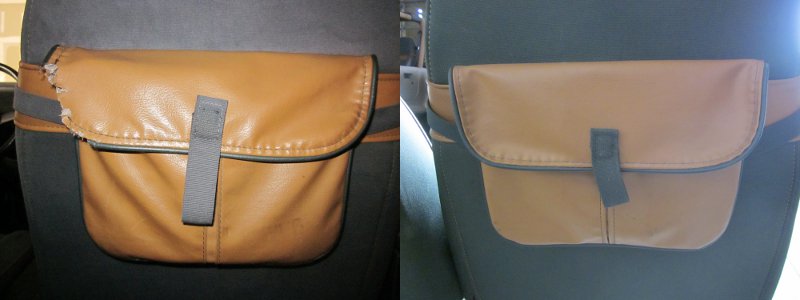
Old vs New Pocket

Old Ratty Chewed on pockets - New(to me) Nice ones!

Jeep #29: Restoring the Interior

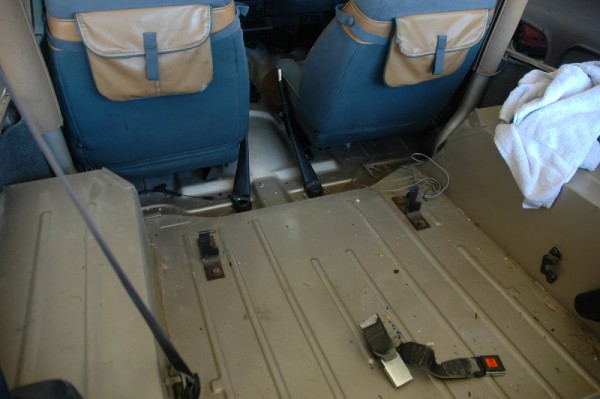
With most of the mechanicals taken care of, I began working on the interior. The Jeep was not well taken care of, supposedly it was a 2 owner jeep (carfax verified), and both owners in the same family. Obviously this family doesn’t take care of it’s vehicles… I took the whole interior out except the front seats, and gave everything a good cleaning.

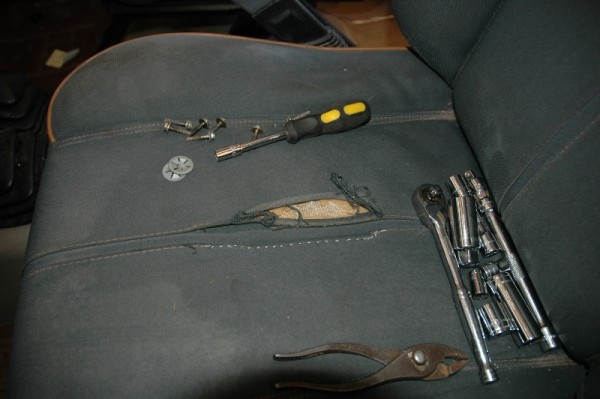
Here the interior is out, and the filth is obvious, look closely and you see the stains on the front seats and the damage to the pockets. The Previous Owner had described this as, “excellent interior, except one rip in drivers seat” Yeah Right! That rip was bad! Not to even mention the rest of the issues..

So not only was it ripped, but it had already been repaired once, and the seat foam was starting to come out of it.

Here is the filthy Carpet And here is the Broken center dash bezel.

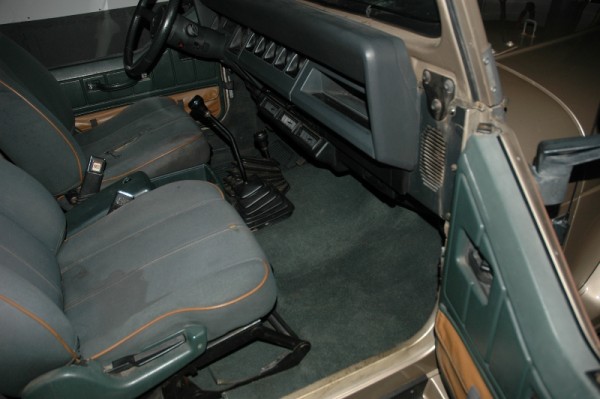
So After Cleaning the Jeep thouroughly, cleaning the carpets, and sourcing a nonbroken dash bezel. I currently have this:

The seats will need more work, and or replacement, as the passenger has burn holes in it, and that rip may not be fixable.

Jeep #29: Build Up Begins – Bringing her Home

My build began with the purchase of a 1993 Wrangler Sahara on August 18th.  She had 129,000 miles on her, and was purchased from Arizona.   She looked, and the previous owner had described her to be pretty much exactly what I was looking for.  I was mislead…  And buying a car long distance leaves you little recourse in such a case….  Here is what she looked like then.

You’ll notice she has half doors, but a hard top.  The previous owner no longer had any of the soft top hardware, but she was originally a soft top, as she has original half doors. The hard top is an aftermarket “rally top” which are $2000 to purchase.

The Previous Owner promised me she would make it to Denver.  I Didn’t even make it from Phoenix to Flagstaff before she broke down.  She was loosing power on hills, and dying on me.  UGH.  Thank goodness I have AAA.  After towing her to Flagstaff and doing repairs, the rest of the trip went easy.   But once I got her home, she still was not passing emissions…  So after a trip to my local mechanic, and more $$$. she is now 95% mechanically sound.  She is still leaking from the rear main seal, which is a time consuming repair, but one I can do myself, and as long as I watch the oil level it won’t strand me.

If I had gone to see the jeep in person before buying I might not have bought this particular one…  The seats had much bigger issues than the owner disclosed to me, and front end has been repaired, though the frame is straight, thank goodness, and the respray (in original color) was cheap and poorly done.  But when you fly out to get a long distance car, you kind of kill your options.  I did further negotiate down the price, but not enough really to offset the additional costs and especially not enough to deal with the extra mechanical issues it had.   That puts a dent in my paint budget….

As for what she is missing.. The only stock option she is missing is the original fog lights and a soft top, which is why I was so interested in this jeep.  Finding the correct map pocket half doors can be very difficult, so I wanted those.  Being in Denver the hard top though should make winters much easier to deal with.  And I figured buying a new soft top was easy and cheaper than adding a hard top.  So since this had the rally top with the half doors this one I felt was going to save me a lot of headaches…  Instead I guess you can say it caused me others…. 😉

Jeep #12: Frame has arrived!

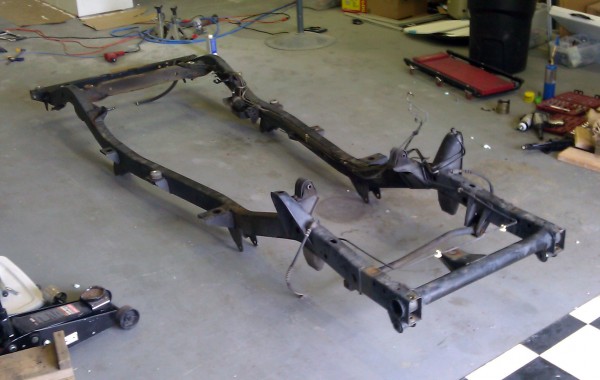
We just picked up this Jeep frame from a local guy. It is virtually rust free. There are a few spot of surface rust that will be easy to take care of, but this frame will be a great start. We’re gonna clean it up, install the new lift kit and suspension and then start swapping parts over from our Jeep! That might not happen for a few months, but we’ll be collecting parts and doing little things to prepare in the meantime.

Jeep #12: Jurassic Park License Plates

We just got in our new stamped metal license plates from Celebrity Machines. They are absolutely great quality and are by far the nicest replica license plates you will find!

http://www.jimshine.com/celebritymachines/store/cm%20store%202011.htm

© 2010 - 2024 Jurassic Jeep - Created by AJ Quick - Jurassic Park is a Registered Trademark of Universal Studios & Amblin Entertainment, Inc